These are the classic ankle mobility and calf stretches that I often recommend, and there are a few options and alternatives that can be done. Whilst these will generally feel like the back of the calf is being stretched all of these muscles attach onto the foot, as I briefly explained in this post about the foot.
There are three subtly different exercises to do to really get into the different areas of the calf. This is because the most superficial muscle (called the Gastrocnemius) crosses both the ankle joint and the back of the knee. If that is tight you’ll bump into that tightness first and not until that is longer will you be able to get into the deeper layers. The next layer in is the Soleus muscle that attaches onto the shin bone (tibia) and crosses just ankle joint. The deepest layer include the longer toe muscles and muscles that help to maintain the arches of the foot.
So to really get into the whole calf you want to try to stretch these individually, and you will likely feel them in subtle different places.
At the bottom of this page there are some videos of me showing you the movements.
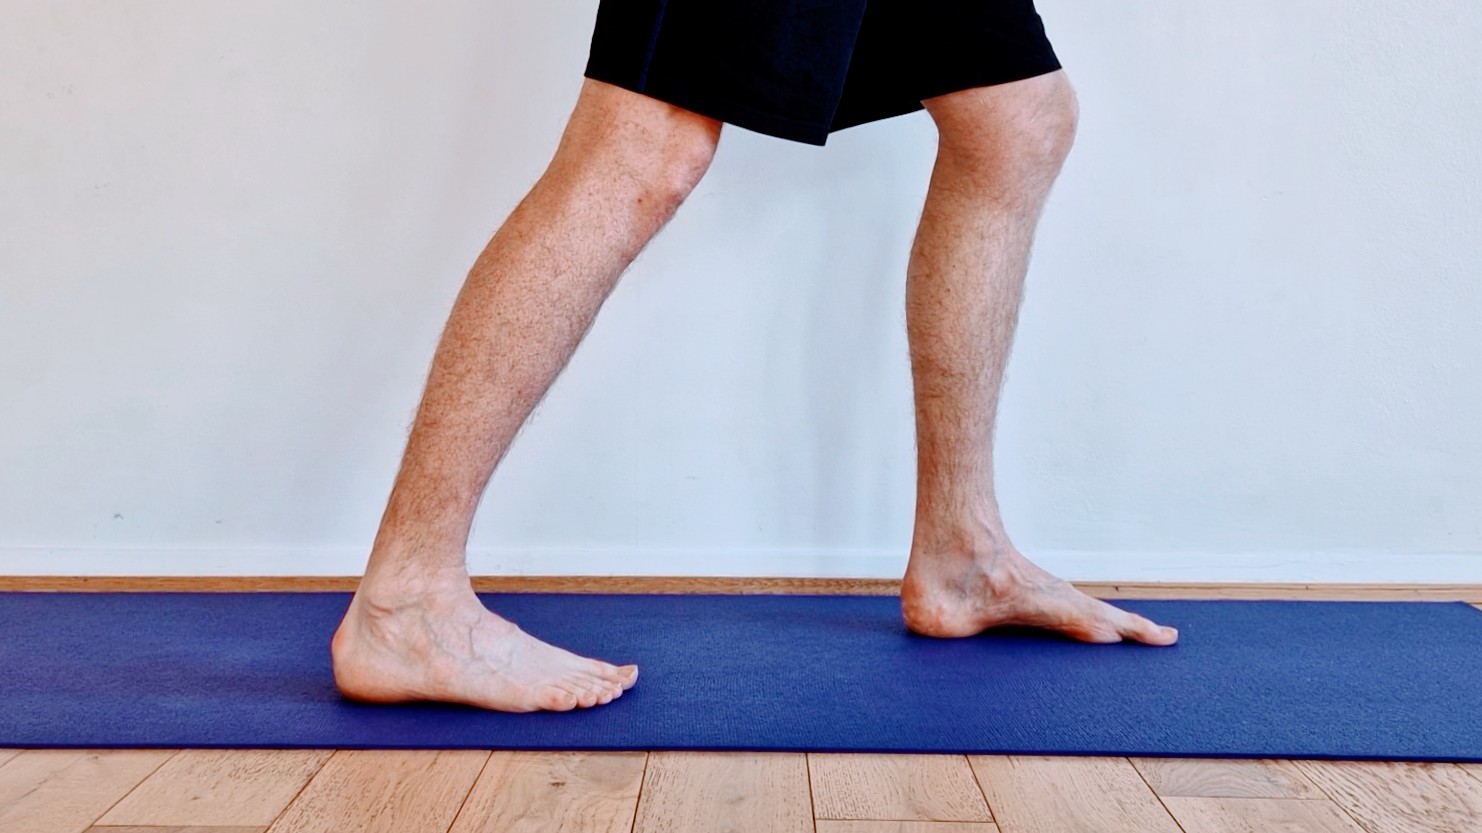
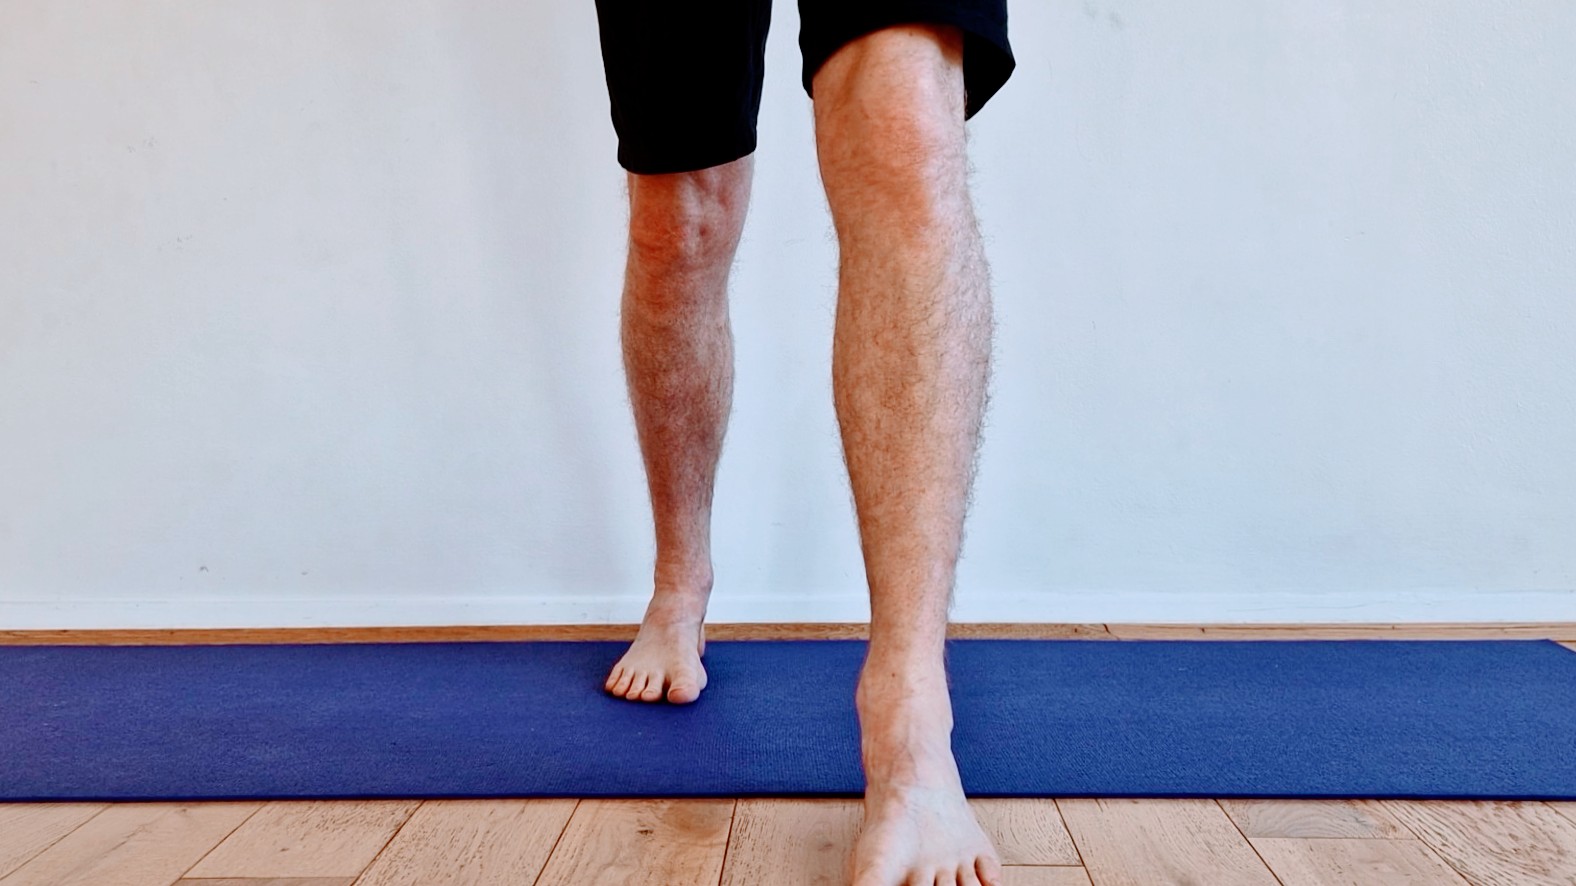
Stretch 1: Gastrocnemius stretch – Straight knee.
Equipment
None
Steps
- Stand upright, feet hip width apart, with both feet pointing forward.
- Take a step forward with one foot, keeping it approximately hip width apart: we’re not trying to walk along a tight rope. We’re looking to stretch things at the back of the leg.
- Notice if you’ve re-positioned the back foot when you stepped forward with the other, you still want the heel to be behind the middle toes and not turned outward.
- Notice the heel of the back foot, this wants to be in contact with the ground, and to remain in contact throughout.
- Bend the front knee to apply the stretch. I generally feel this towards the top of the calf.
- Hold this for approximately 30 seconds.
- Step back to having both feet next to each other and then repeat with the other foot stepping forward.
To increase the stretch:
- Take a longer stride.
- Place a block or book under the toes of the back foot and keep the heel on the ground as you do the stretches.
Video – Gastroc stretch
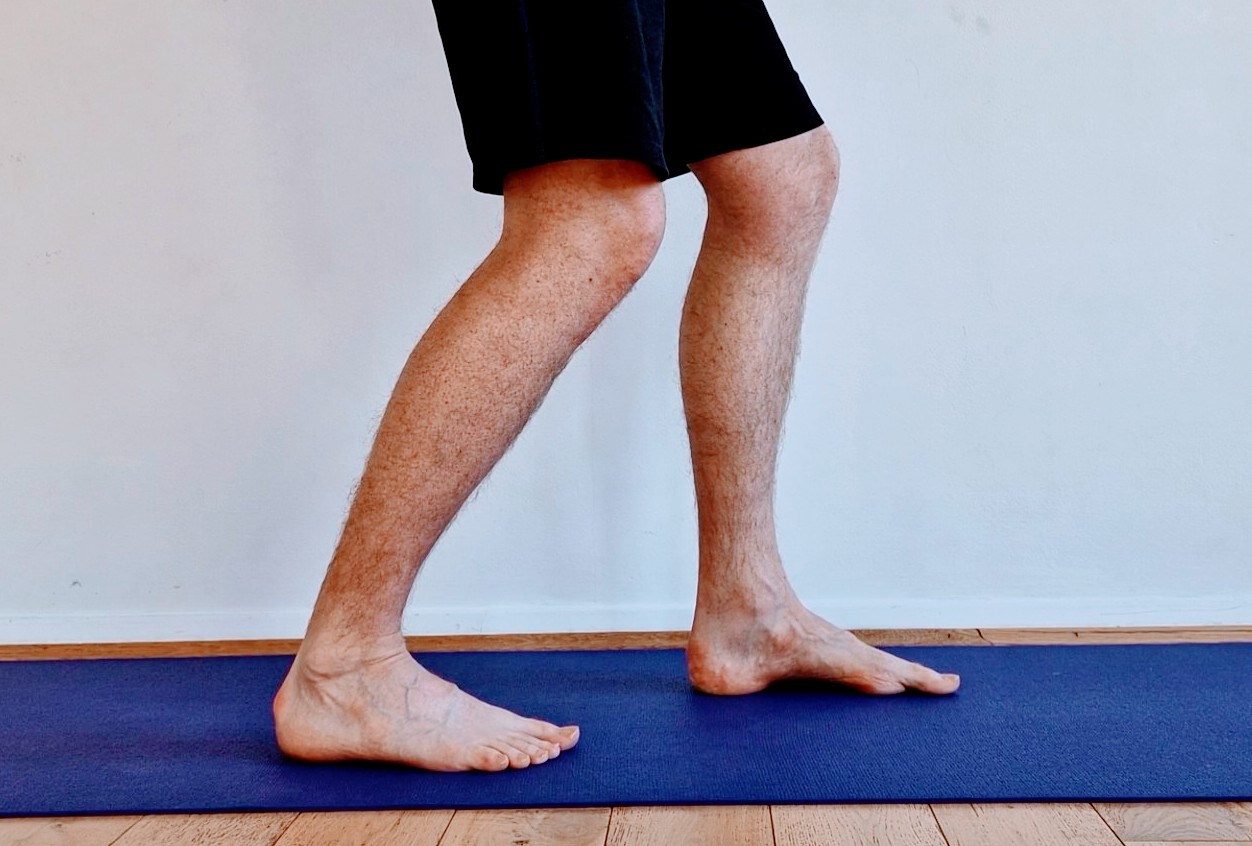
Stretch 2: Soleus stretch – Bent knee.
- From standing with feet hip width apart, feet pointing forwards.
- Take a slightly shorter step forwards than you did with the first stretch. Again you don’t want to walk a tight rope, but keep your feet hip width apart. By all means have a chair or something else nearby to help with balance if that is an issue for you, this isn’t really a balance exercise, but a focus onto the lower leg.
- Keeping the back heel in firm contact with the ground, bend BOTH knees so you sink downwards, until you feel an appropriate stretch in the back leg. I tend to feel this about halfway down the calf.
- Hold this for approximately 30 seconds.
- Step back to having both feet next to each other and then repeat with the other foot stepping forward.
To increase the stretch:
- Take a longer stride.
- Place a block or book under the toes of the back foot and keep the heel on the ground as you do the stretches.
Video – Soleus stretch
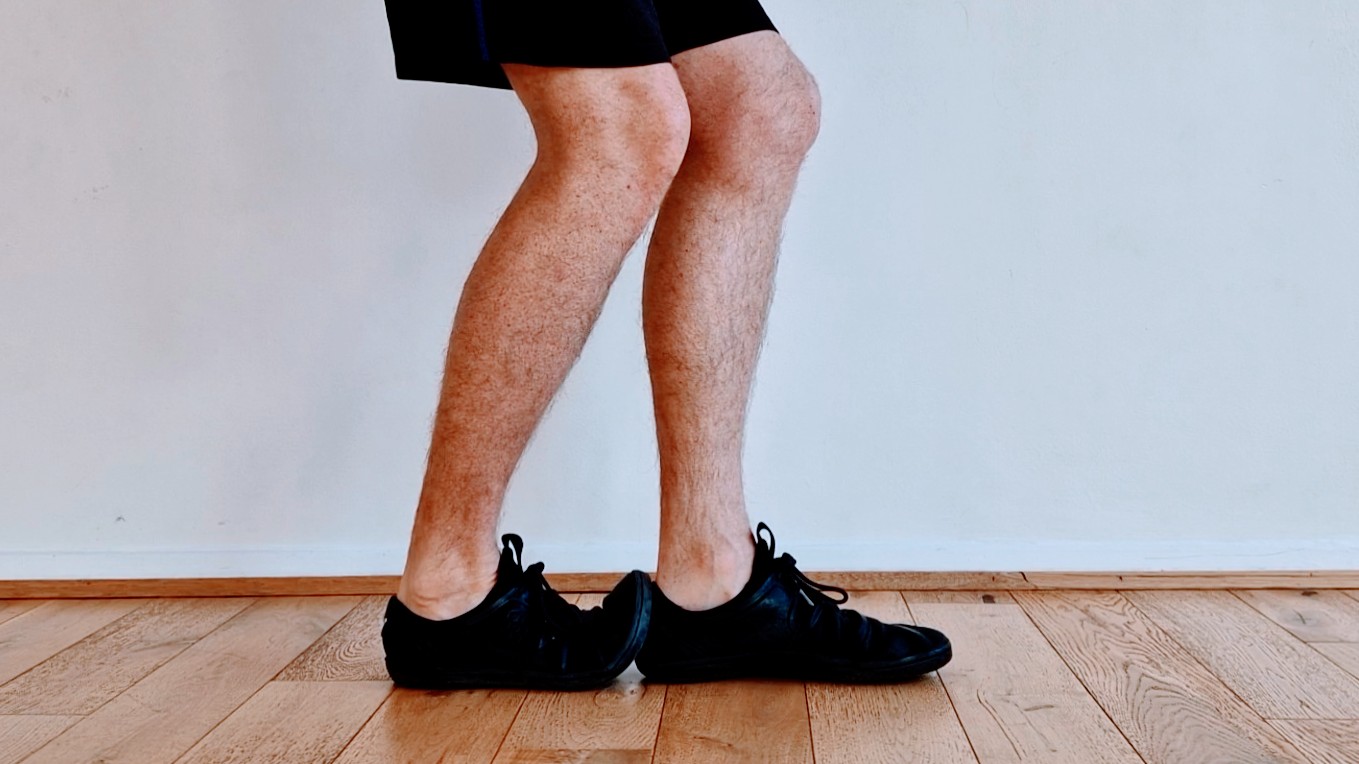
Stretch 3: Deep compartment and toes stretch – Bent knee and bent toes.
This stretch is for use when you have shoes on.
- With shoes on, you can remain standing and stretch into the toes. It is more of a balance than the previous two stretches so i suggest you have something to hand (chair, wall) that will help you maintain your balance, rather than wobbling and not being able to focus on the calf stretch.
- Bend the toes on one foot, and rest the toe part of that shoe onto the heel of the other shoe, keeping the toes bent. Have the sole of the foot and the heel down. If you’re wearing your best shoes you might want to slip them off and do the bare foot version.
- Bend both knees to attain the stretch, keeping the back heel down. I generally feel this into the achilles tendon area of the foot.
- Hold this for approximately 30 seconds.
- Step back to having both feet next to each other and then repeat with the other foot stepping forward.
Video – Standing Toe stretch
This stretch is for use when you have bare feet.
- With feet bare, kneel down on the ground. Put some padding under the knees as this is not about torturing your bony knees on the ground.
- Tuck your toes under, and stay kneeling up. This may feel quite intense and this may be as far as you are able to go.
- Lower your bottom down towards your knees, stopping where you feel you get an appropriate stretch. Placing a cushion between your bottom and your heels can help if you can’t actually sit back on your heels.
- Hold this for approximately 30 seconds, or build up to this.
NB this should not cause problems with the knees so please be mindful of them.
To increase the stretch:
- Pick one knee up and push the heel backwards as you lower the knee back down, its almost as if you are walking your knees closer to your toes.
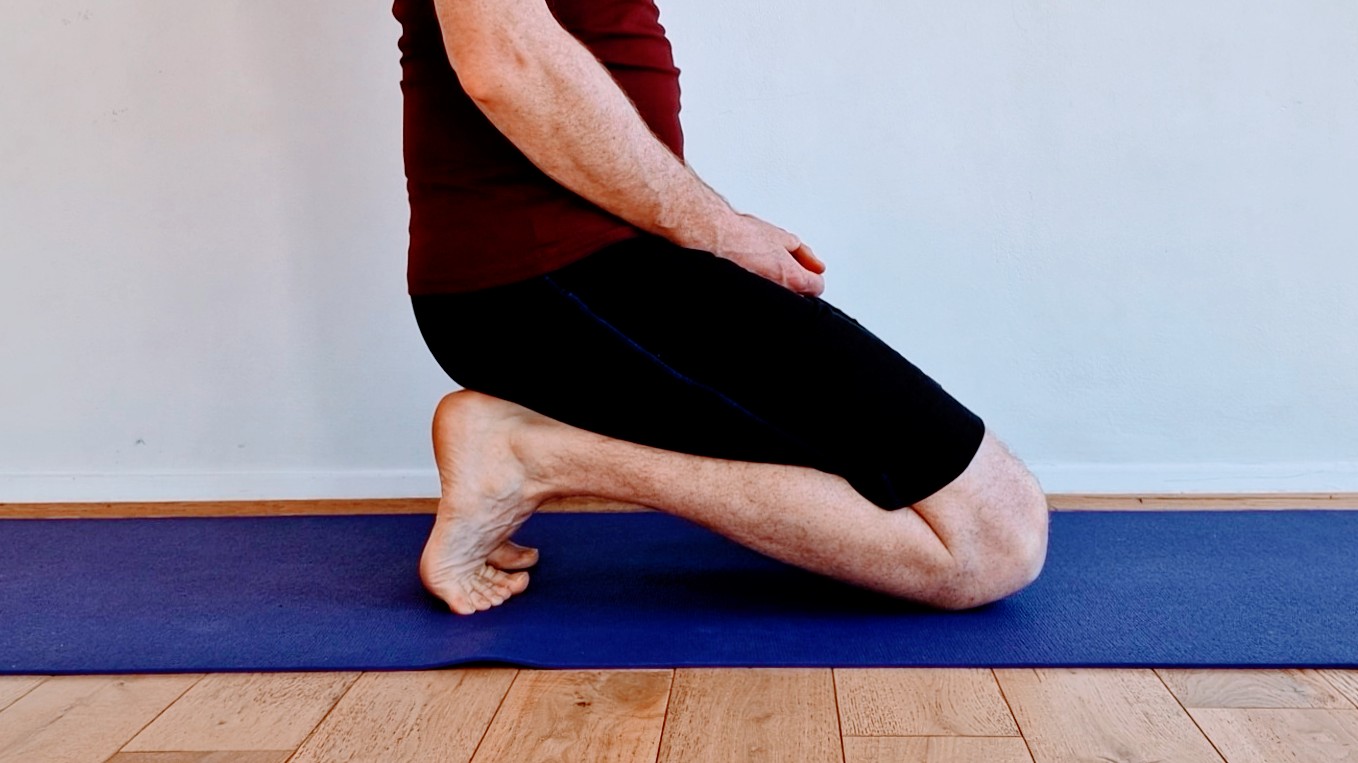
Video – Kneeling Toe stretch
These can be done at other times. One of which is when I’m going up escalators (if I’m not walking up them):
I stand with just my toes on the step, holding on to the rail) and allow my heels to drop down. I do this first with both knees straight, and then again with knees bent. This can, of course, be done on a normal step as well, I like to suggest times when these stretches can be snuck into daily life.
Why do I say to hold the static stretch for 30 seconds? I put it like this: the first 10 seconds it feels like the muscles are shocked into wondering what this position is. Then the next 10 seconds they start to relax into the position, and the final 10 seconds they might also be able to move a bit deeper into the movement, and accept that this is possible.
Videos
Here are all four videos for each of the stretches, click on the arrows to make the videos full screen.
Stretch 1 – Gastrocnemius
Stretch 3 – Standing, with shoes
Stretch 2 – Soleus
Stretch 3 – Kneeling
Thanks for reading this my lovely Interonauts.
Tim


