The side of the body can be an area that has a lot of tight areas. It can be the waist area or the hips and sides of the legs. So this stretch can be used to access all of them: the quadratus lumborum (QL) or the Glute Minimus, the Tensor Fascia Lata (TFL) and into the IT Band, as well as the obliques and the latissimus dorsi (lats) up to the arm muscles.
Personally, I find stretching this area can be challenging to the lumbar spine so whilst you ultimately want to spend about five minutes on each side (this is a myofasical focussed stretch) build up gradually, maybe starting off sending 90 seconds on each side. These muscles are also big and strong muscles and need a bit of time to respond.
There is a video at the bottom of this page taking your through the stretches, after the steps and photos.
Equipment
Rolled up towel
Yoga mat if you are lying on the floor, or a bed
Steps
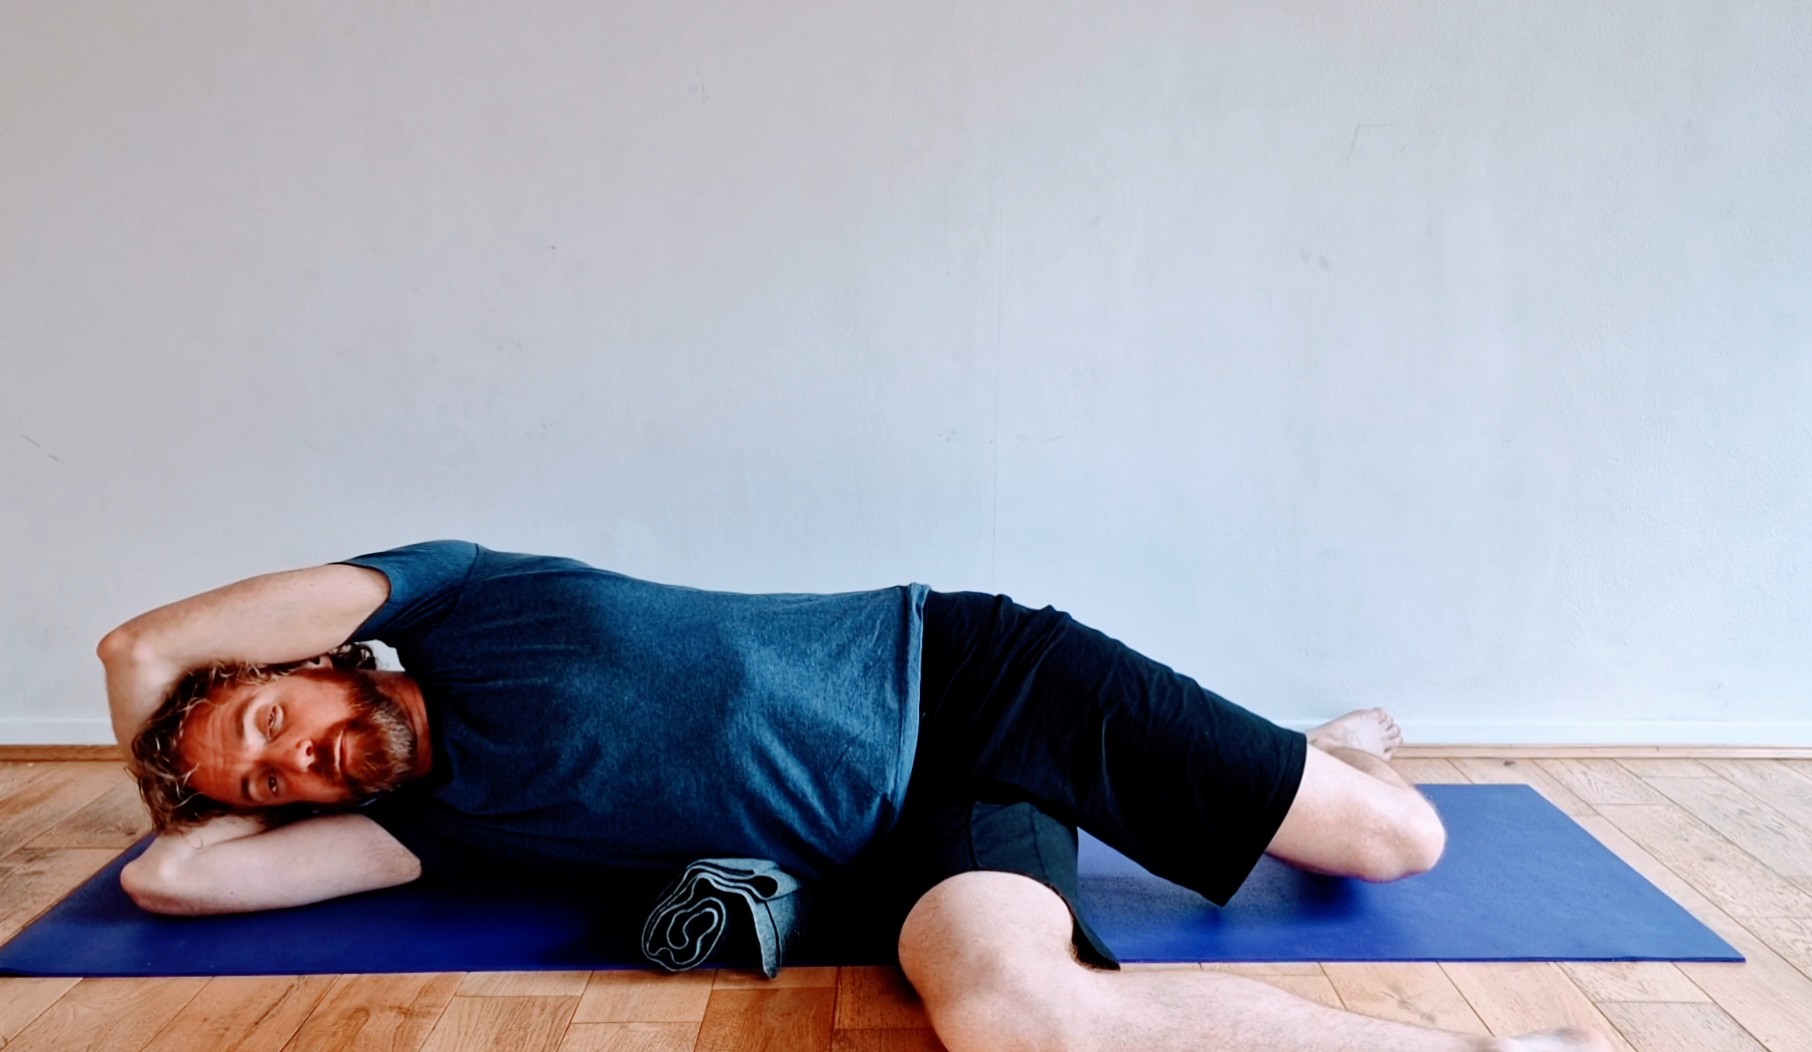
- Lie on your side, have your hips bent to 90 degrees, and knees also bent to 90 degrees.
- Make sure you’re lying directly on your side (rather than rolling the ribcage forwards or backwards)
- If you have a deep curve (lordosis) in your low back, see if you can reduce that a little bit by flattening the low back.
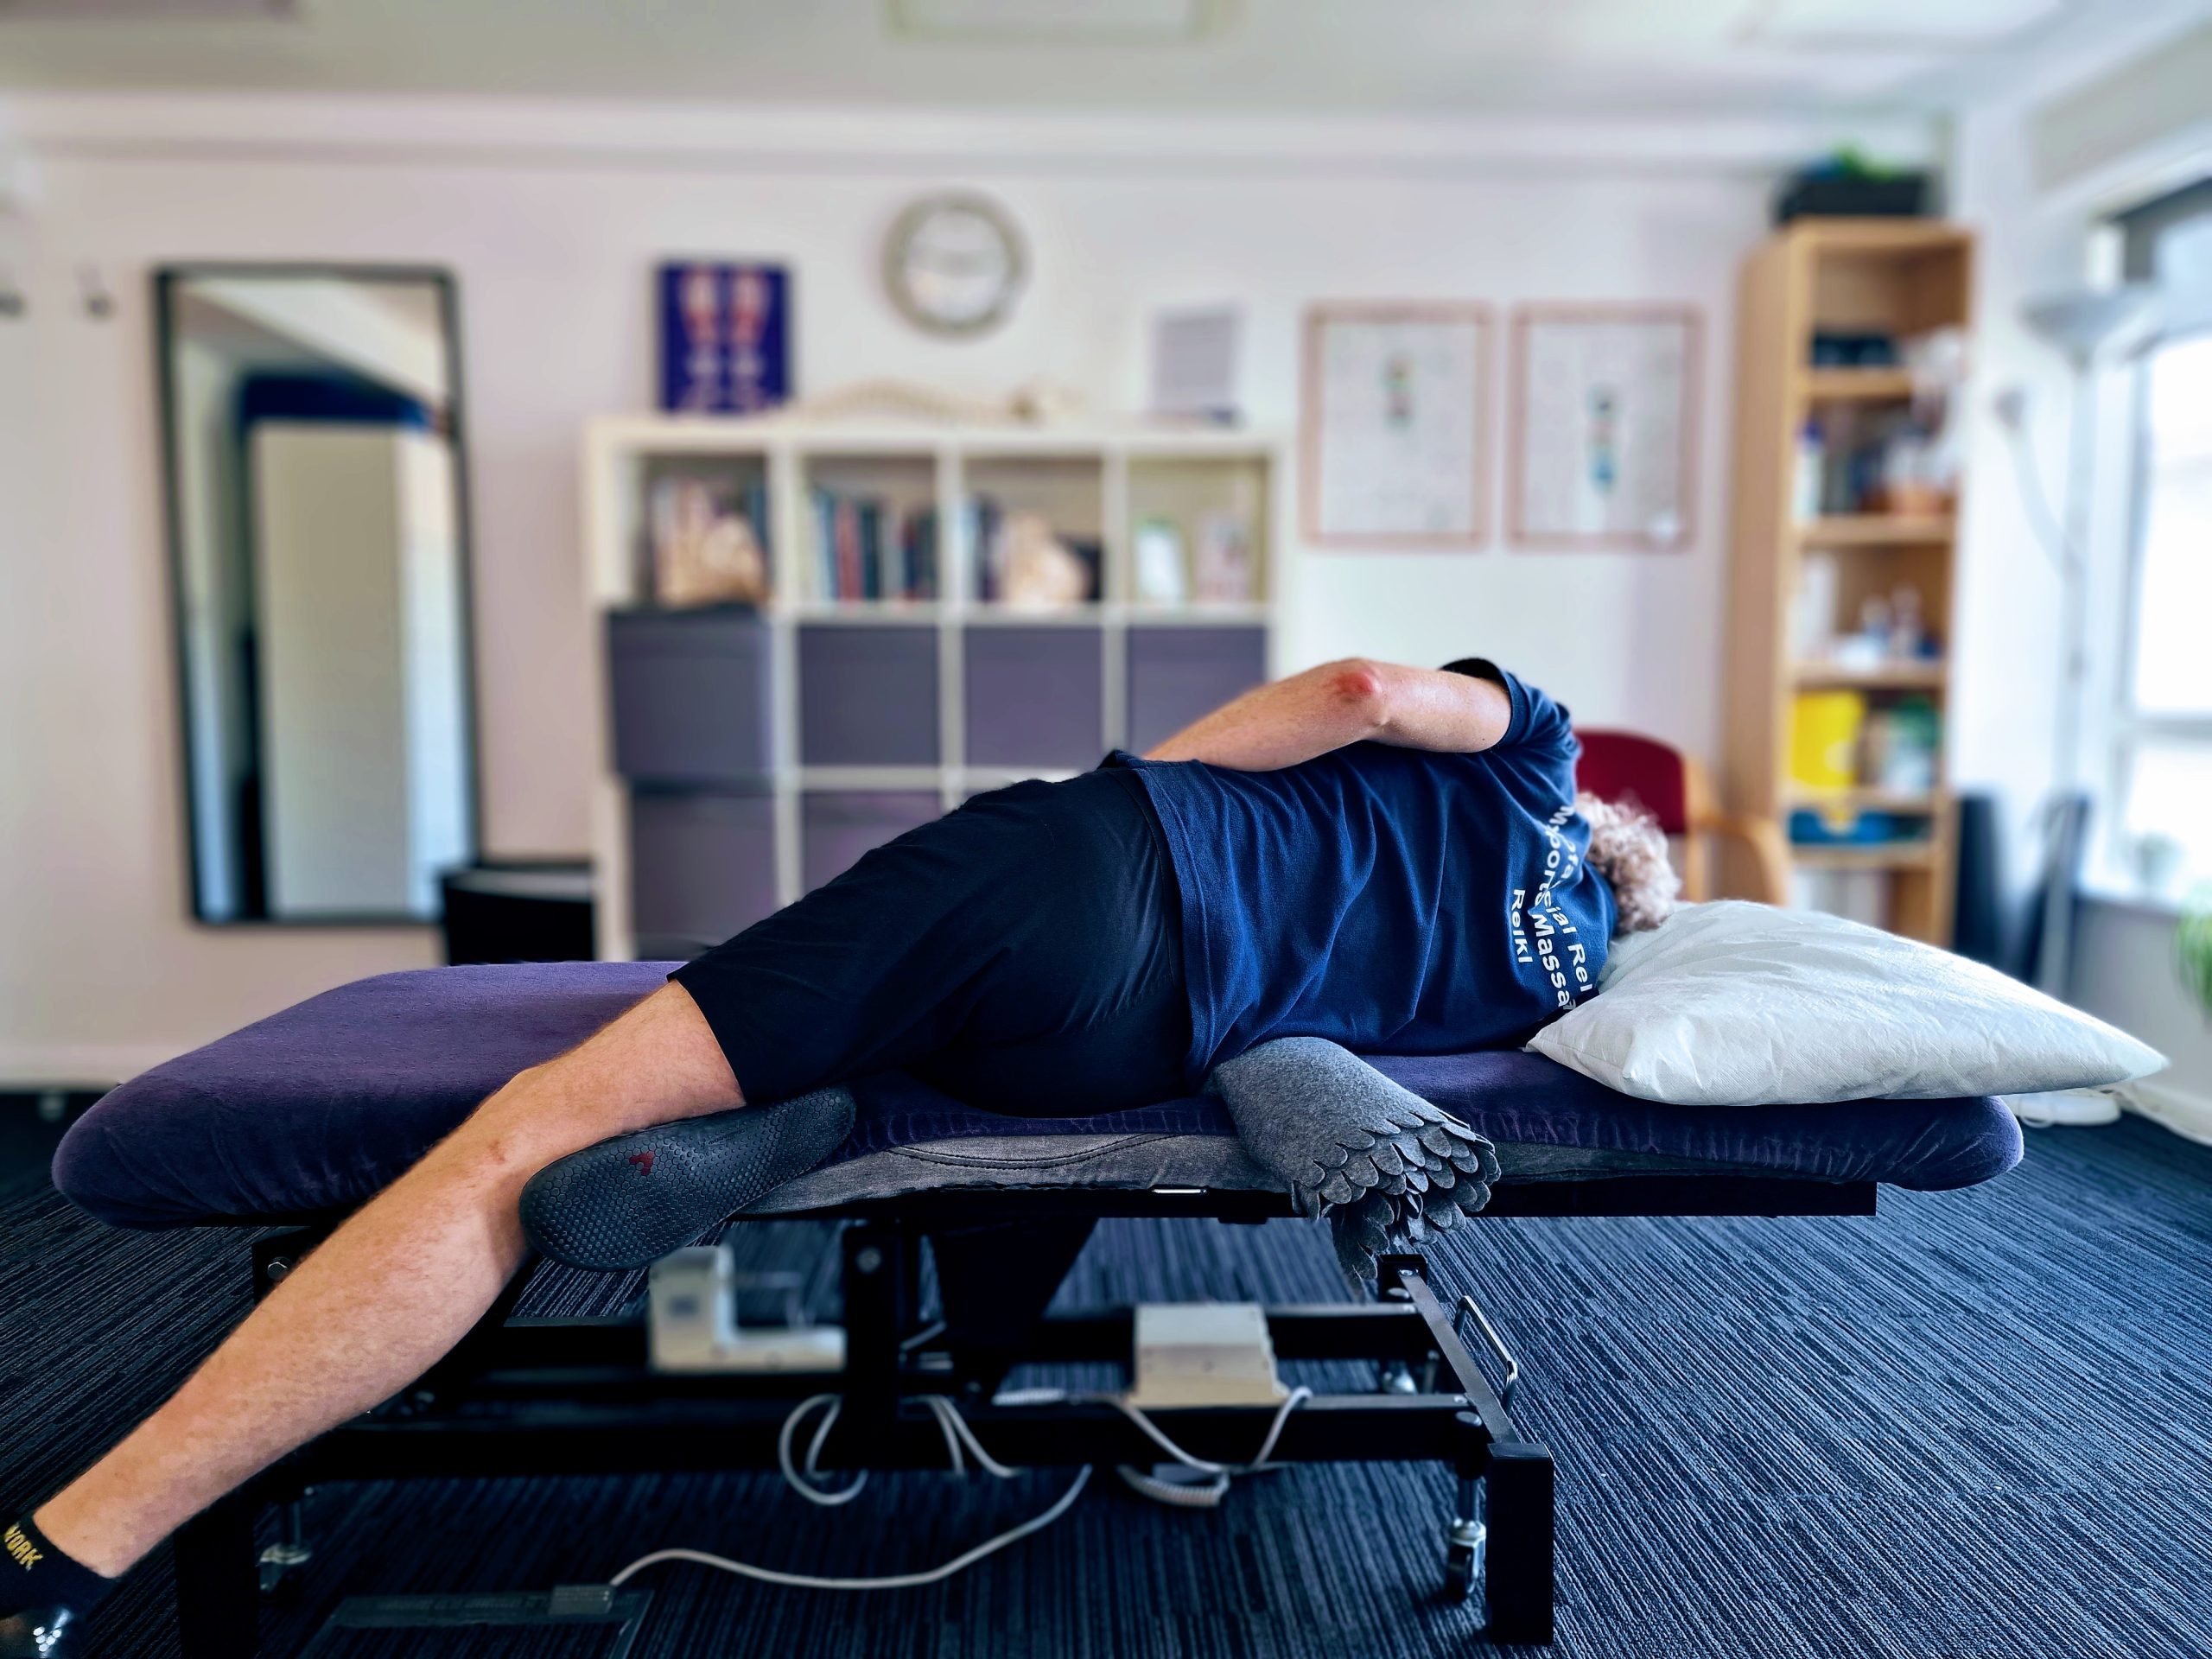
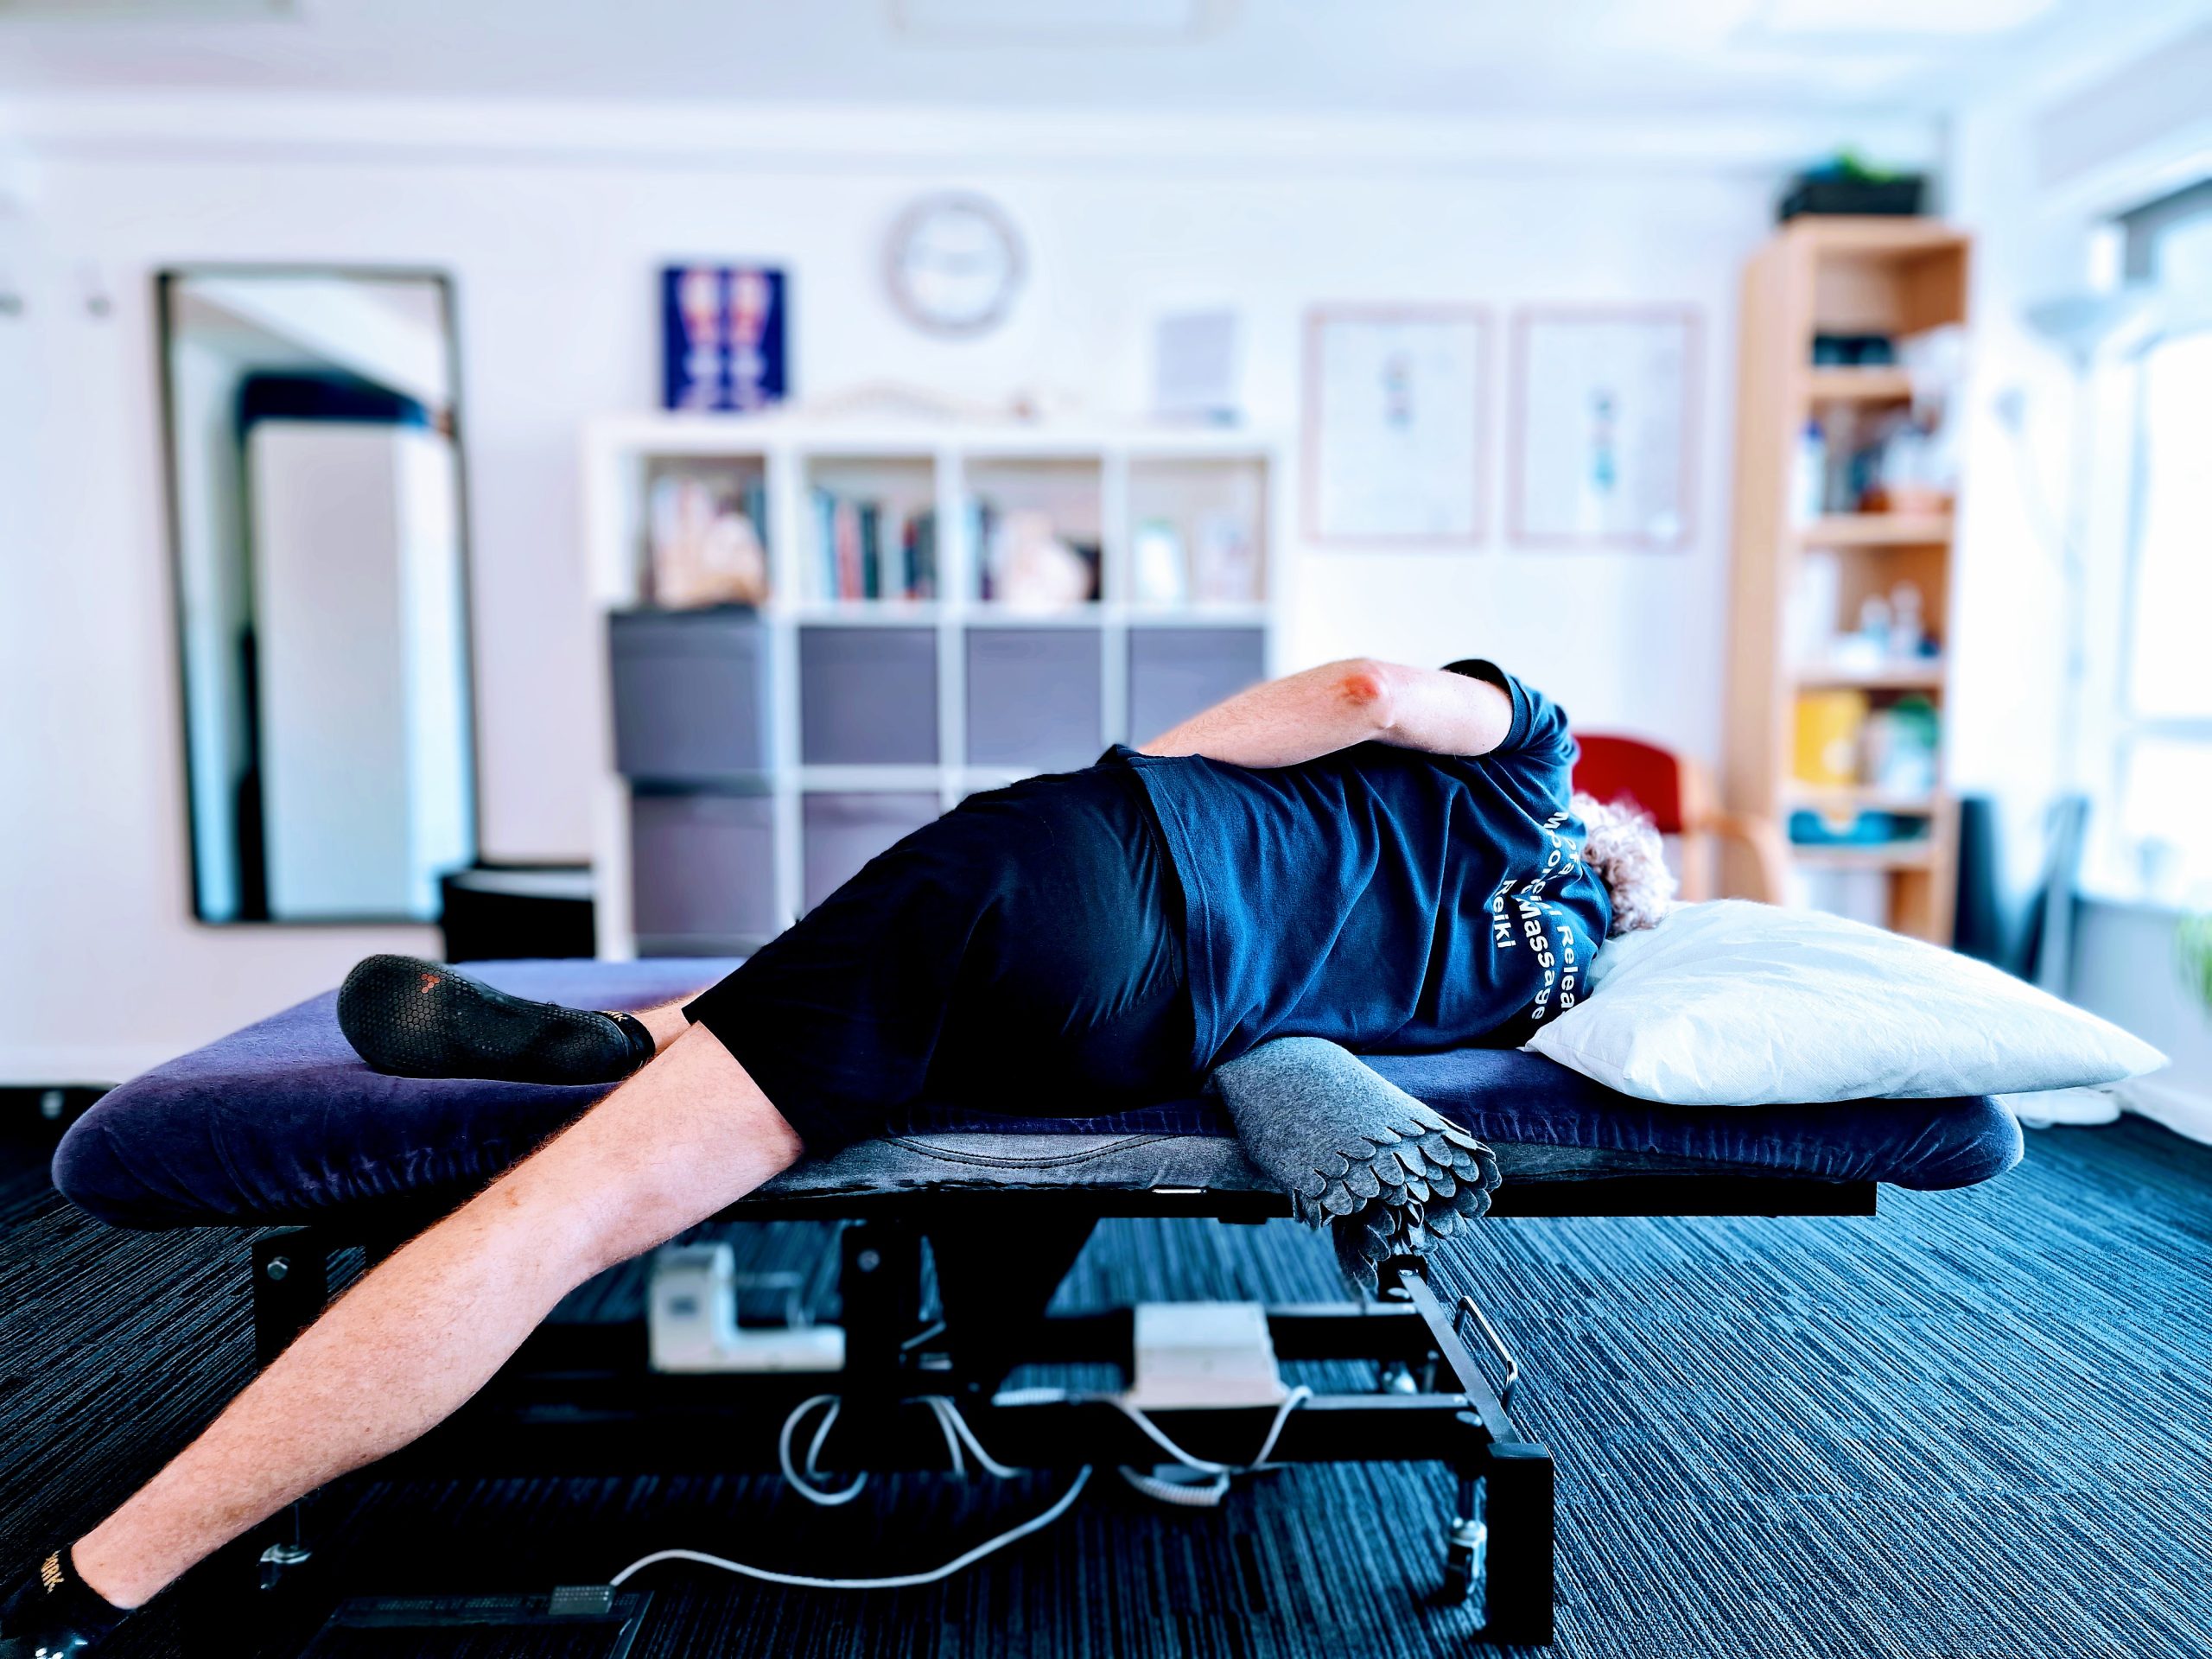
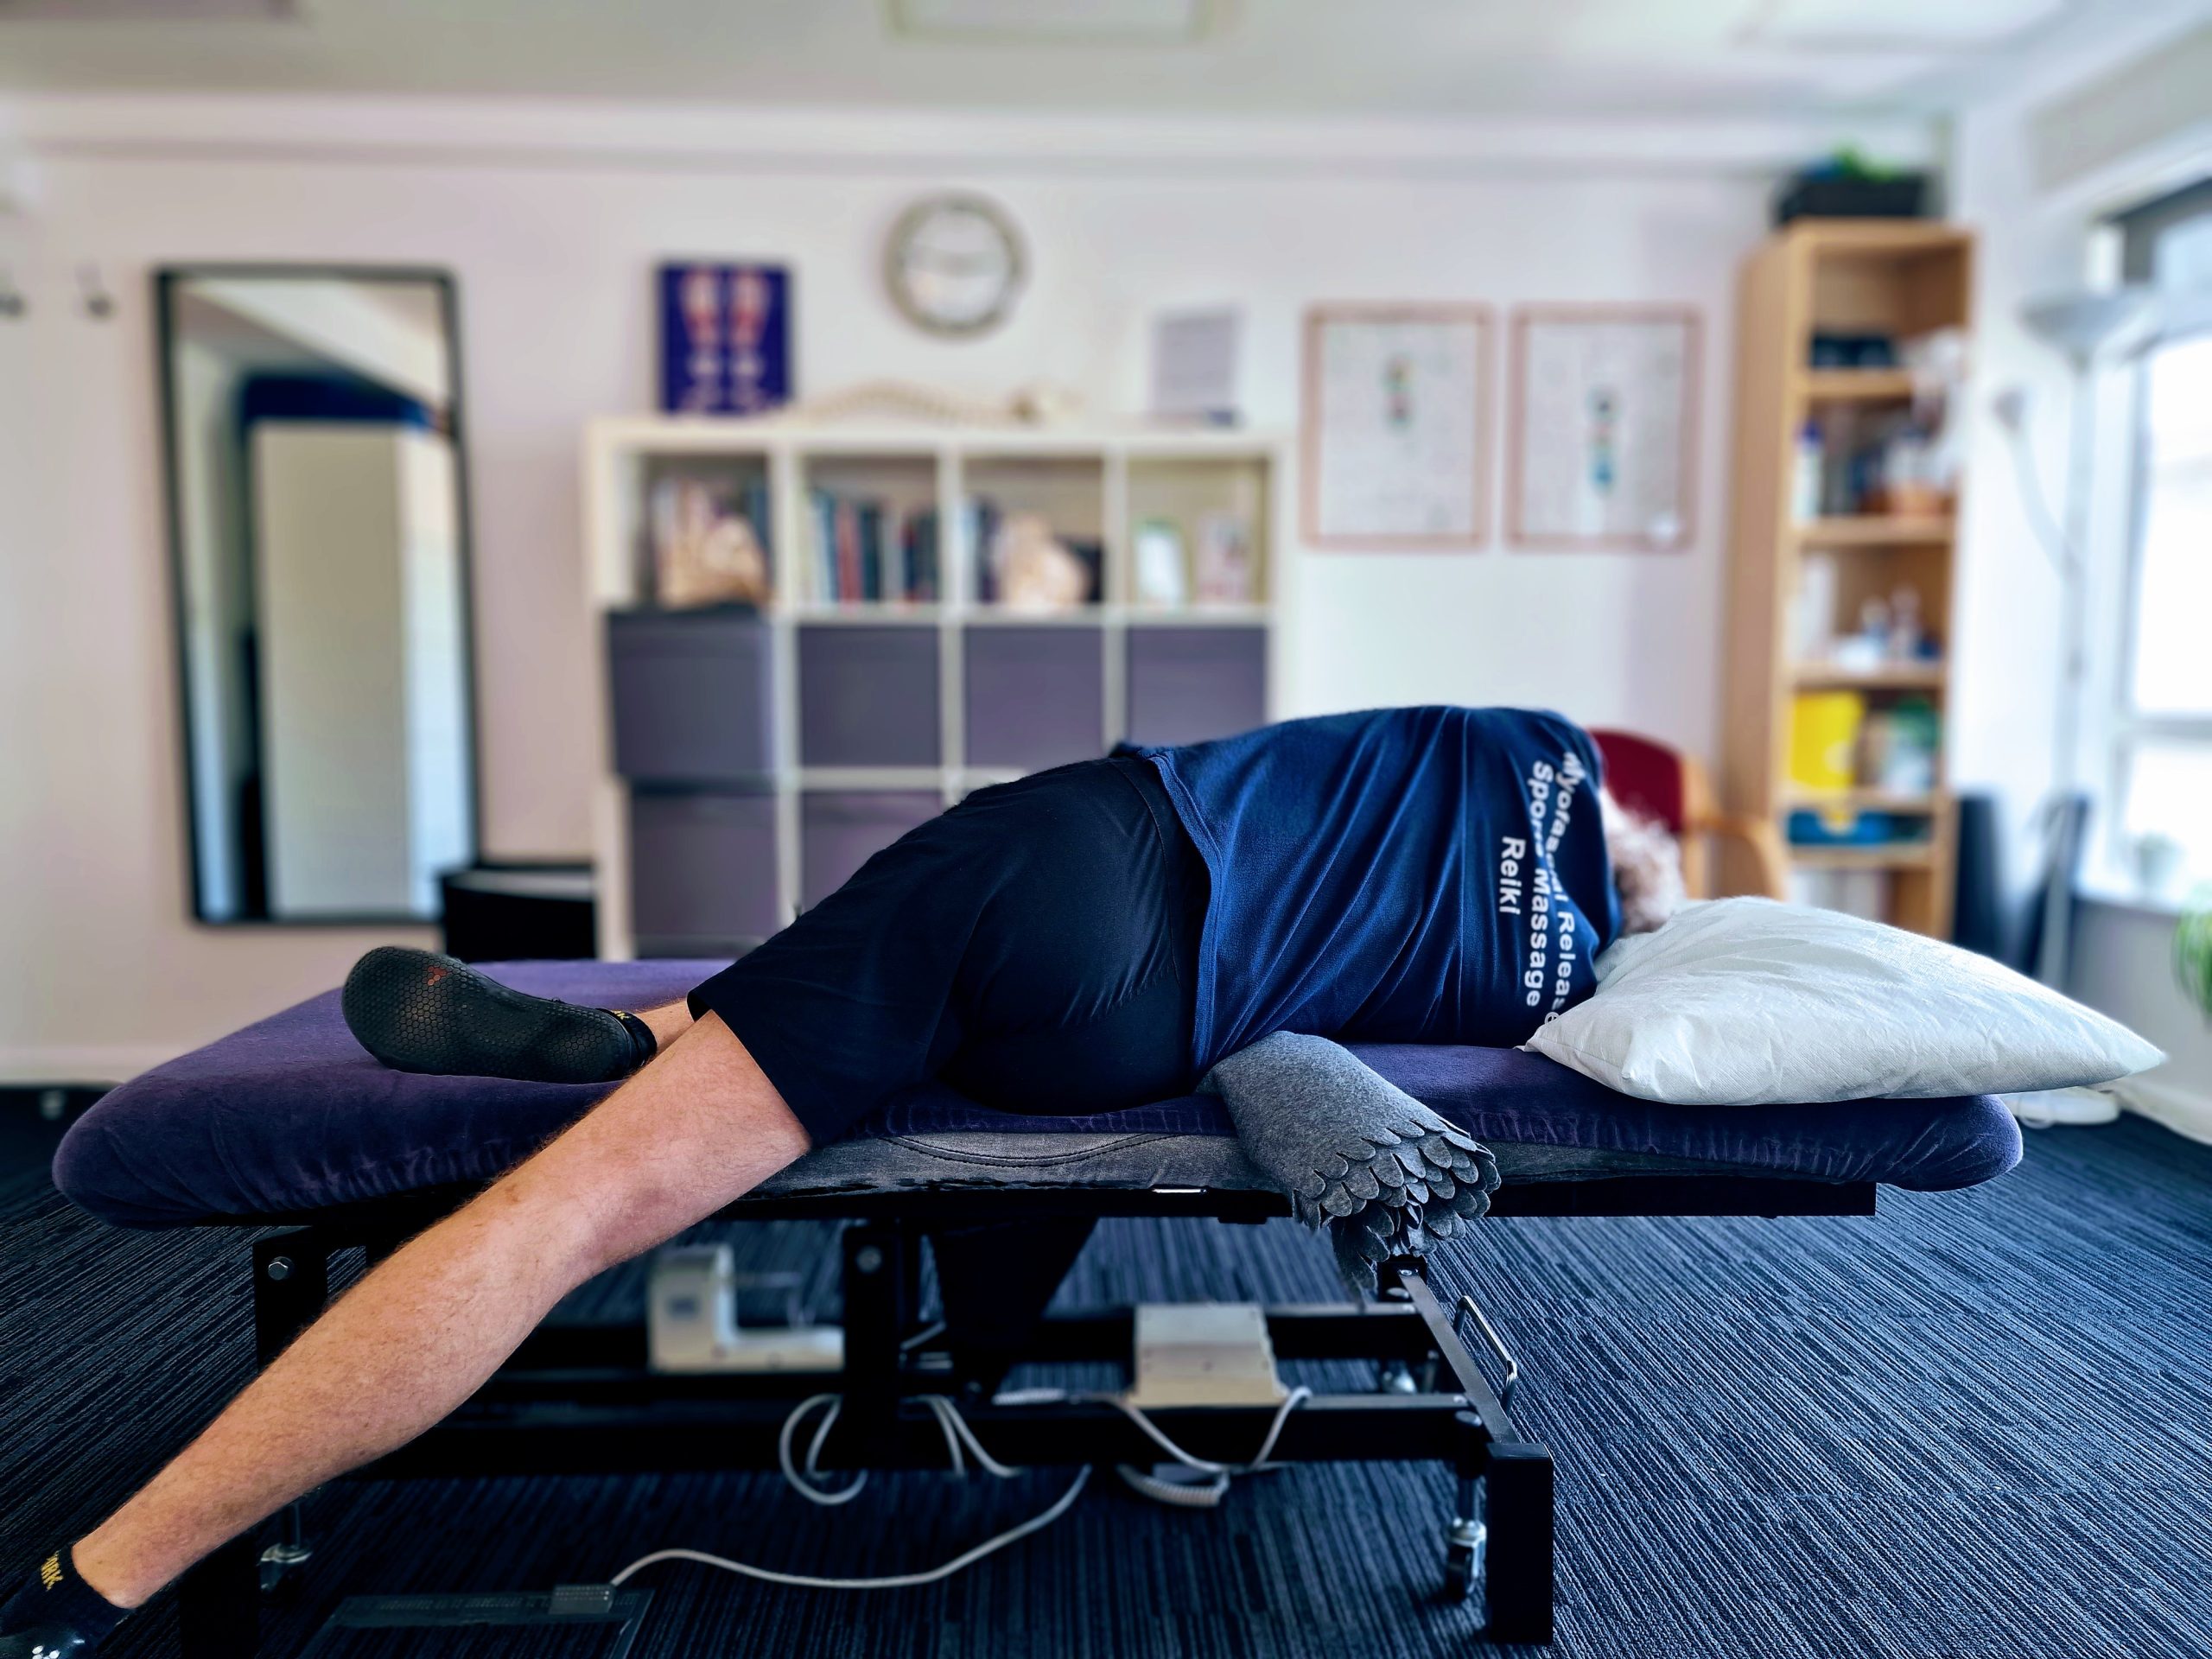
- If you’re lying across a bed poition yourself so that your feet are now at the edge of the bed. If youre lying on the edge of the bed have a look at the images below that show the positioning.
- Place the rolled up towel under your waist, this is to provide a bit of support here and to make sure that your spine doesn’t sink straight down and encourages a bananaring curve.
- Straighten the top leg out in line with the rest of your body and let it rest down onto the ground
- If you are on a bed and the pull is too much on your hip, tuck the foot of the underneath leg under the knee to provide a bit of support.
- If you are on the floor, and the stretch isn’t enough, you can bend the top knee so the knee sinks to the ground.
- Lift your arm over your head, to help include the lats and sides of the ribcage into the stretch. If that feels too much, you don’t have to include the arm (or if you have issues with the arm itself.)
- Breath and wait in this position for as long as you are planning. If this is your first time, maybe attempt 60-90 seconds on each side.
- To come out of the stretch, bring the arm down.
- Slide your top knee forwards until it comes to rest on top of the underneath knee. This prevents you immediately tightening the muscles that you’ve just stretched out.
- Roll over and repeat on the other side.
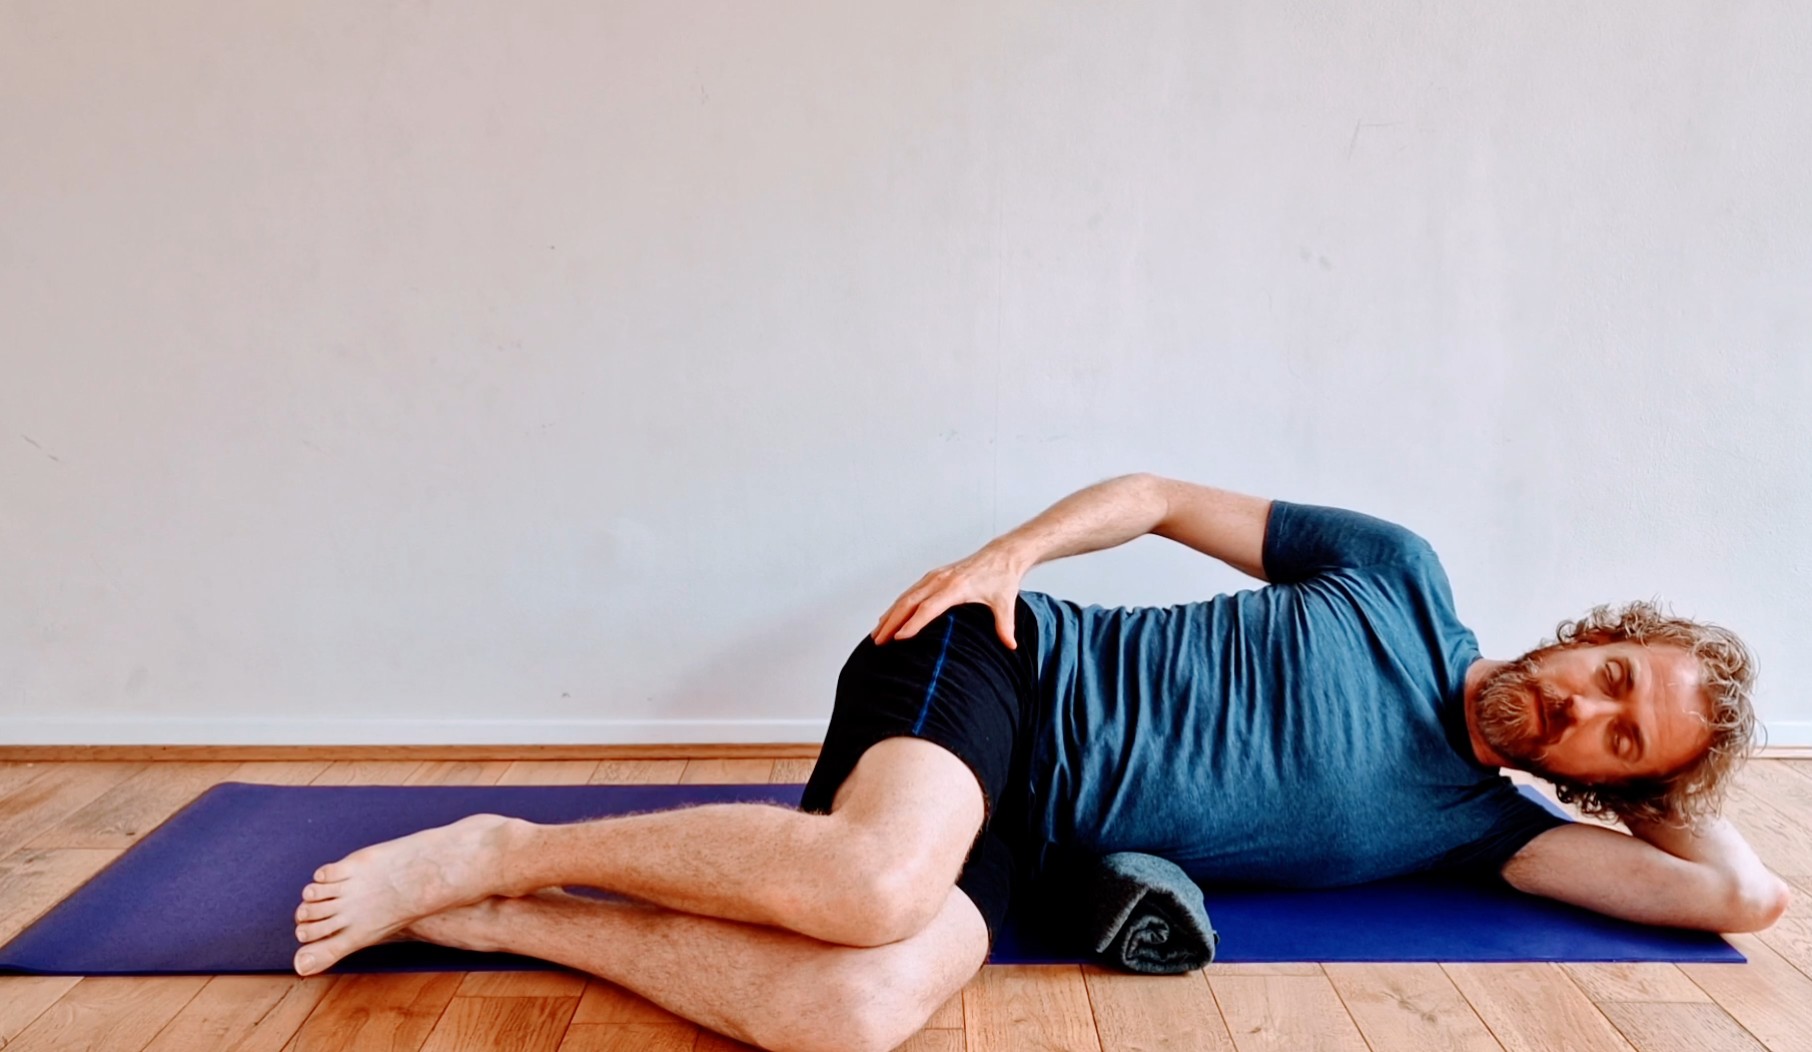
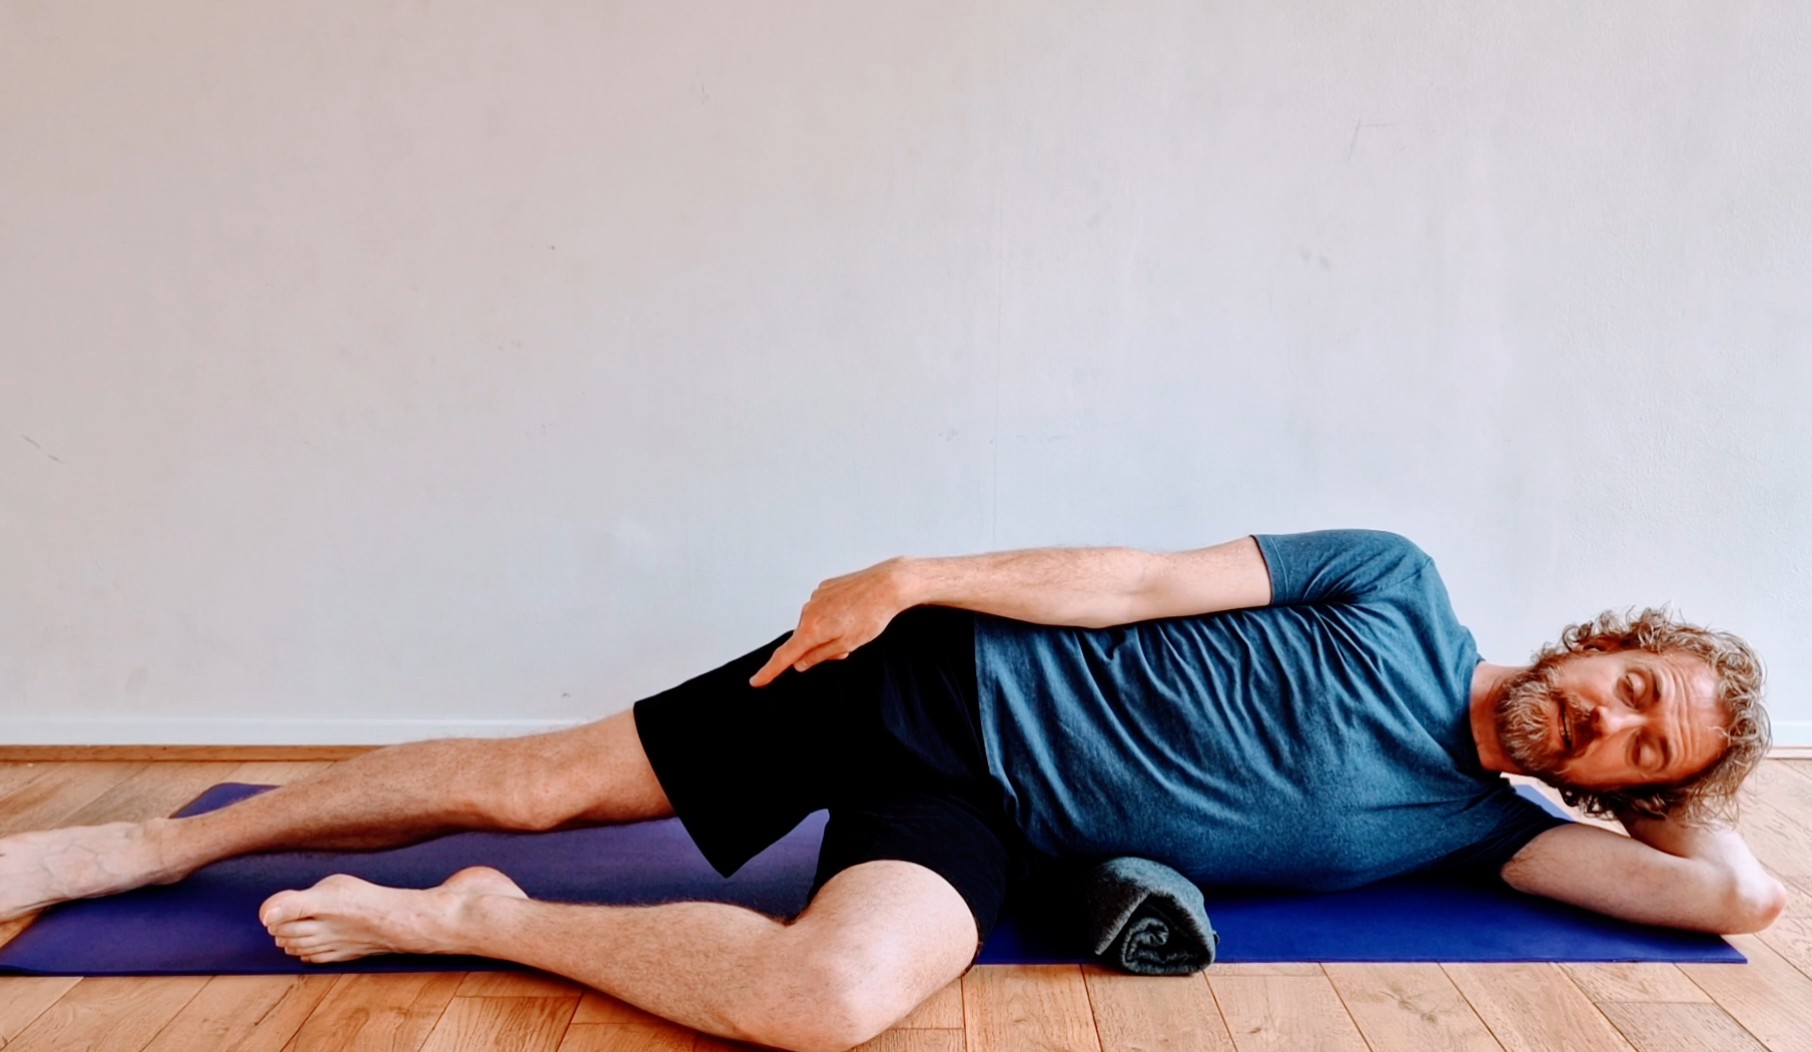
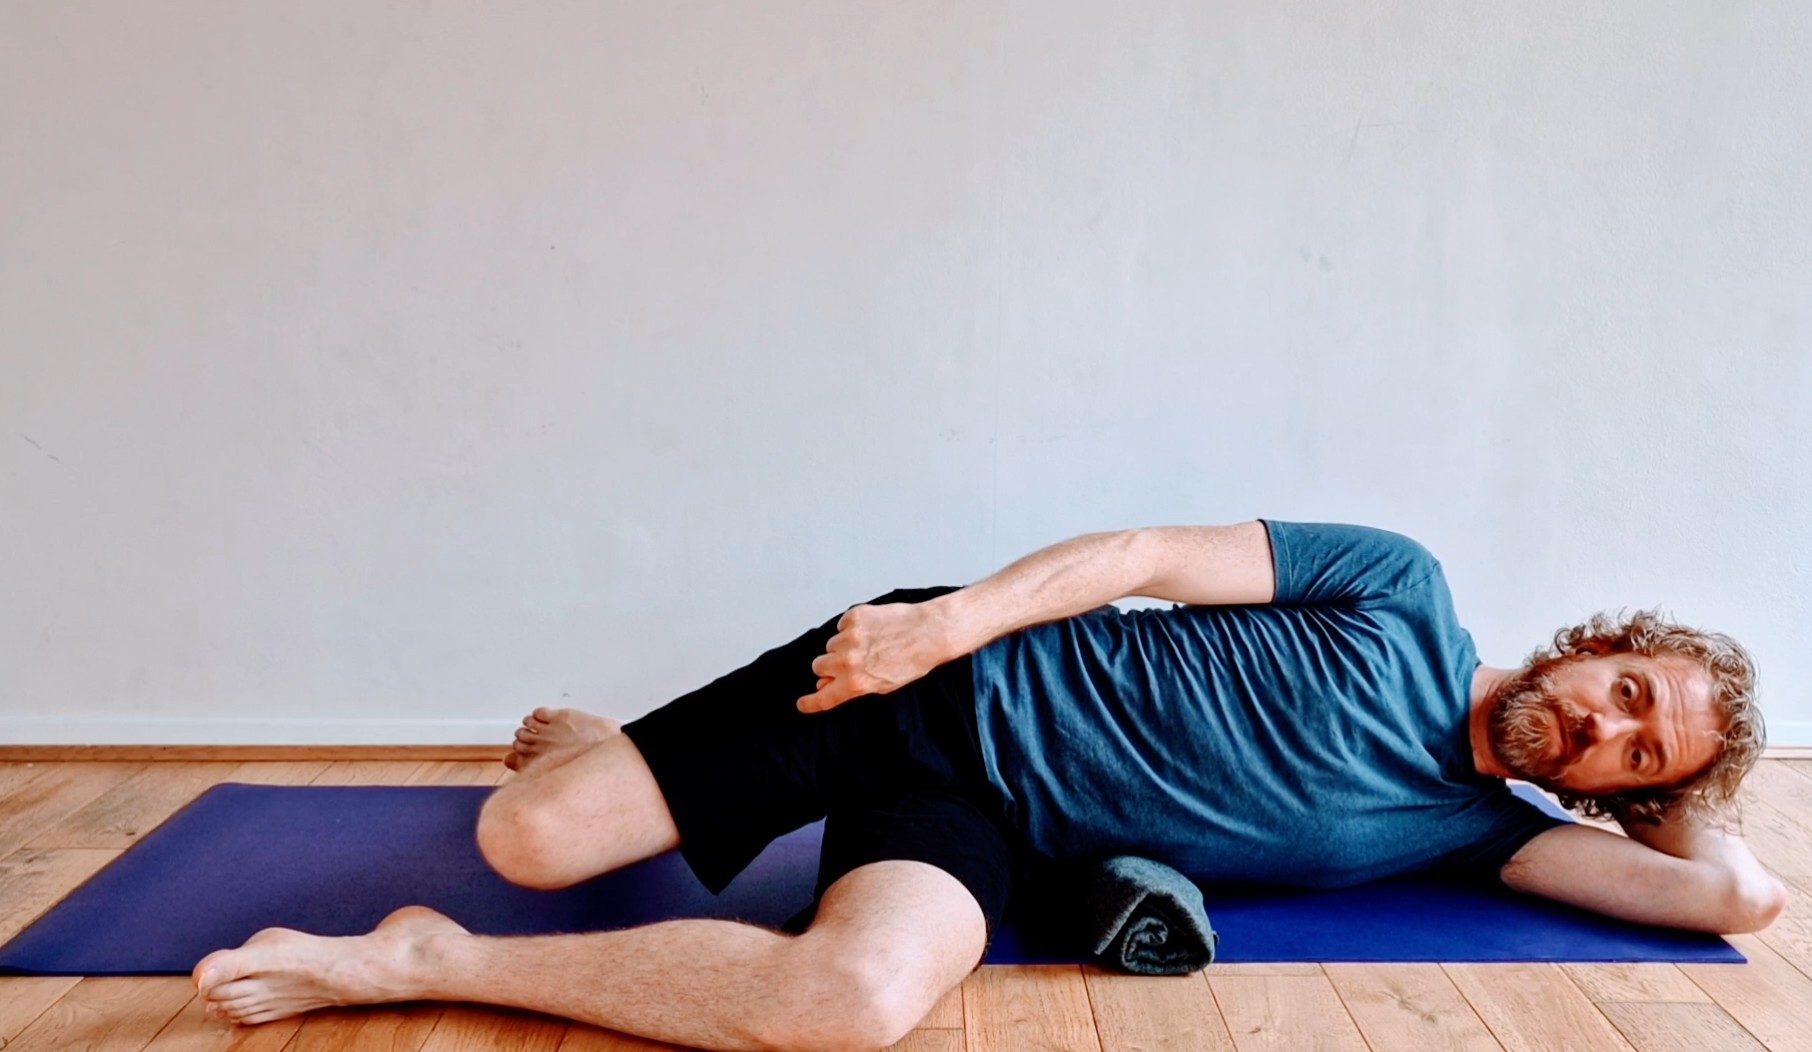
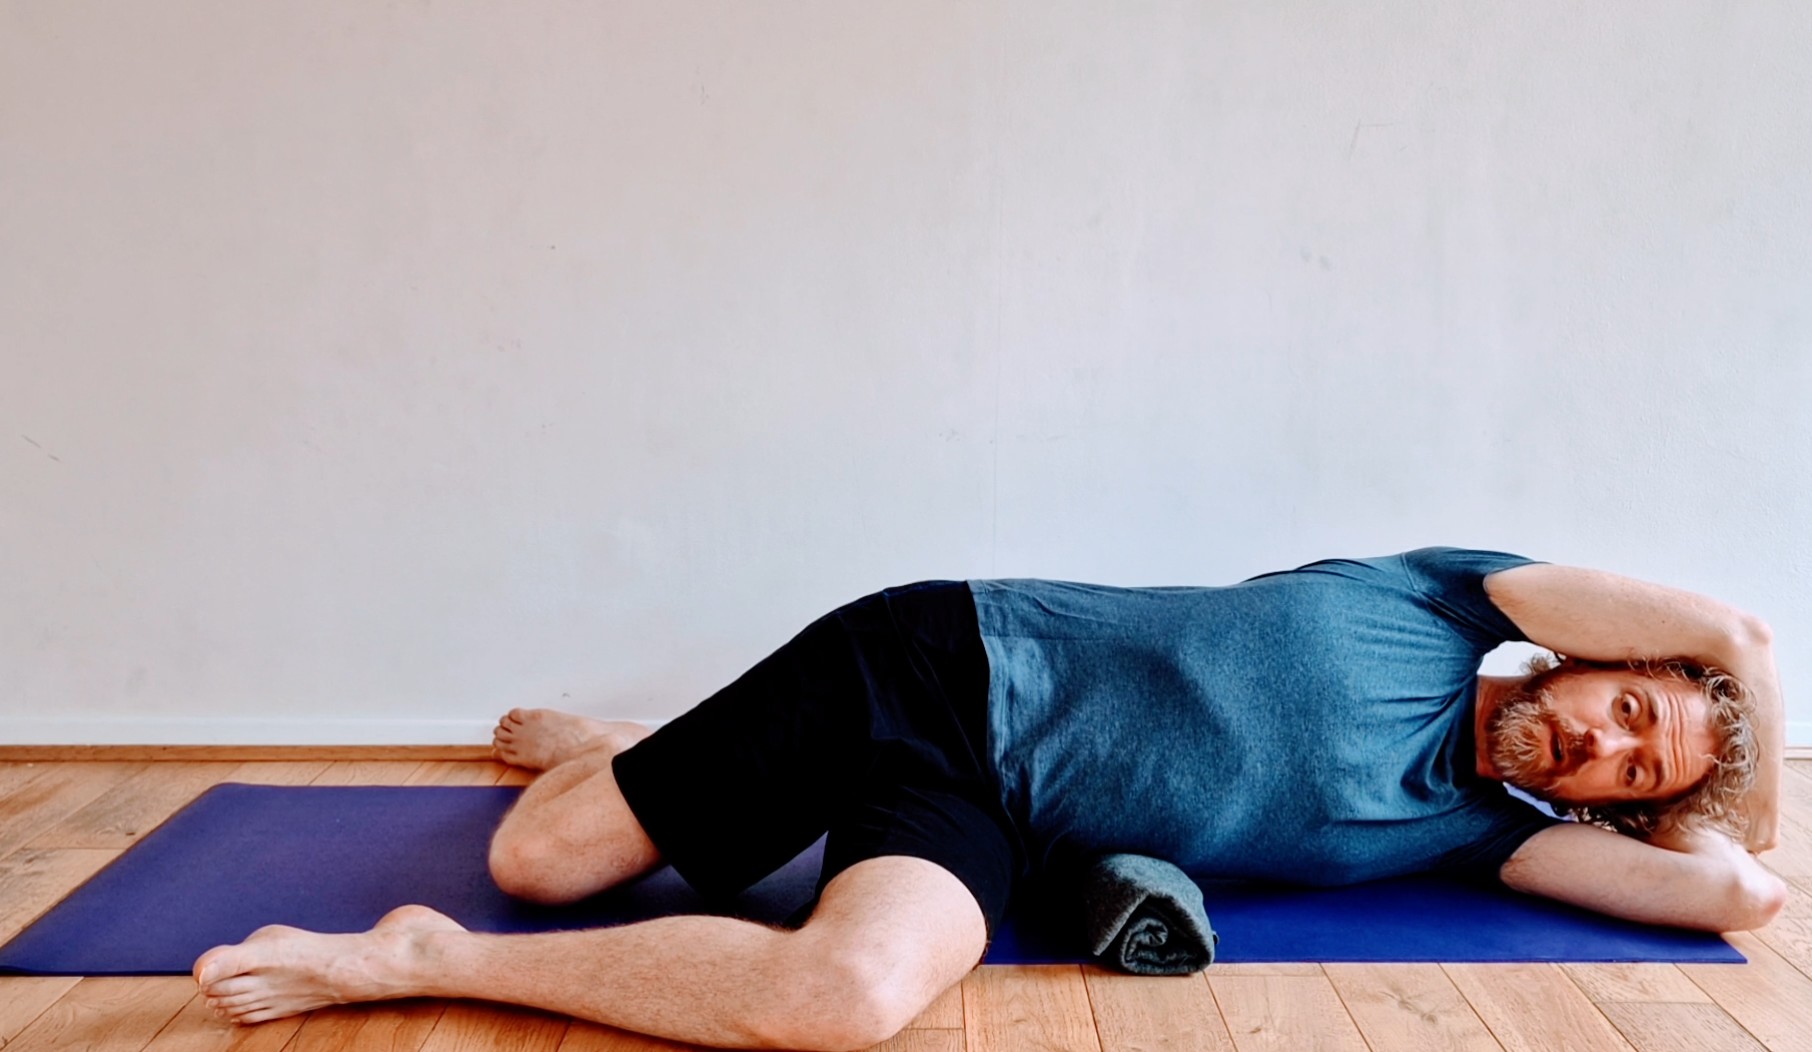
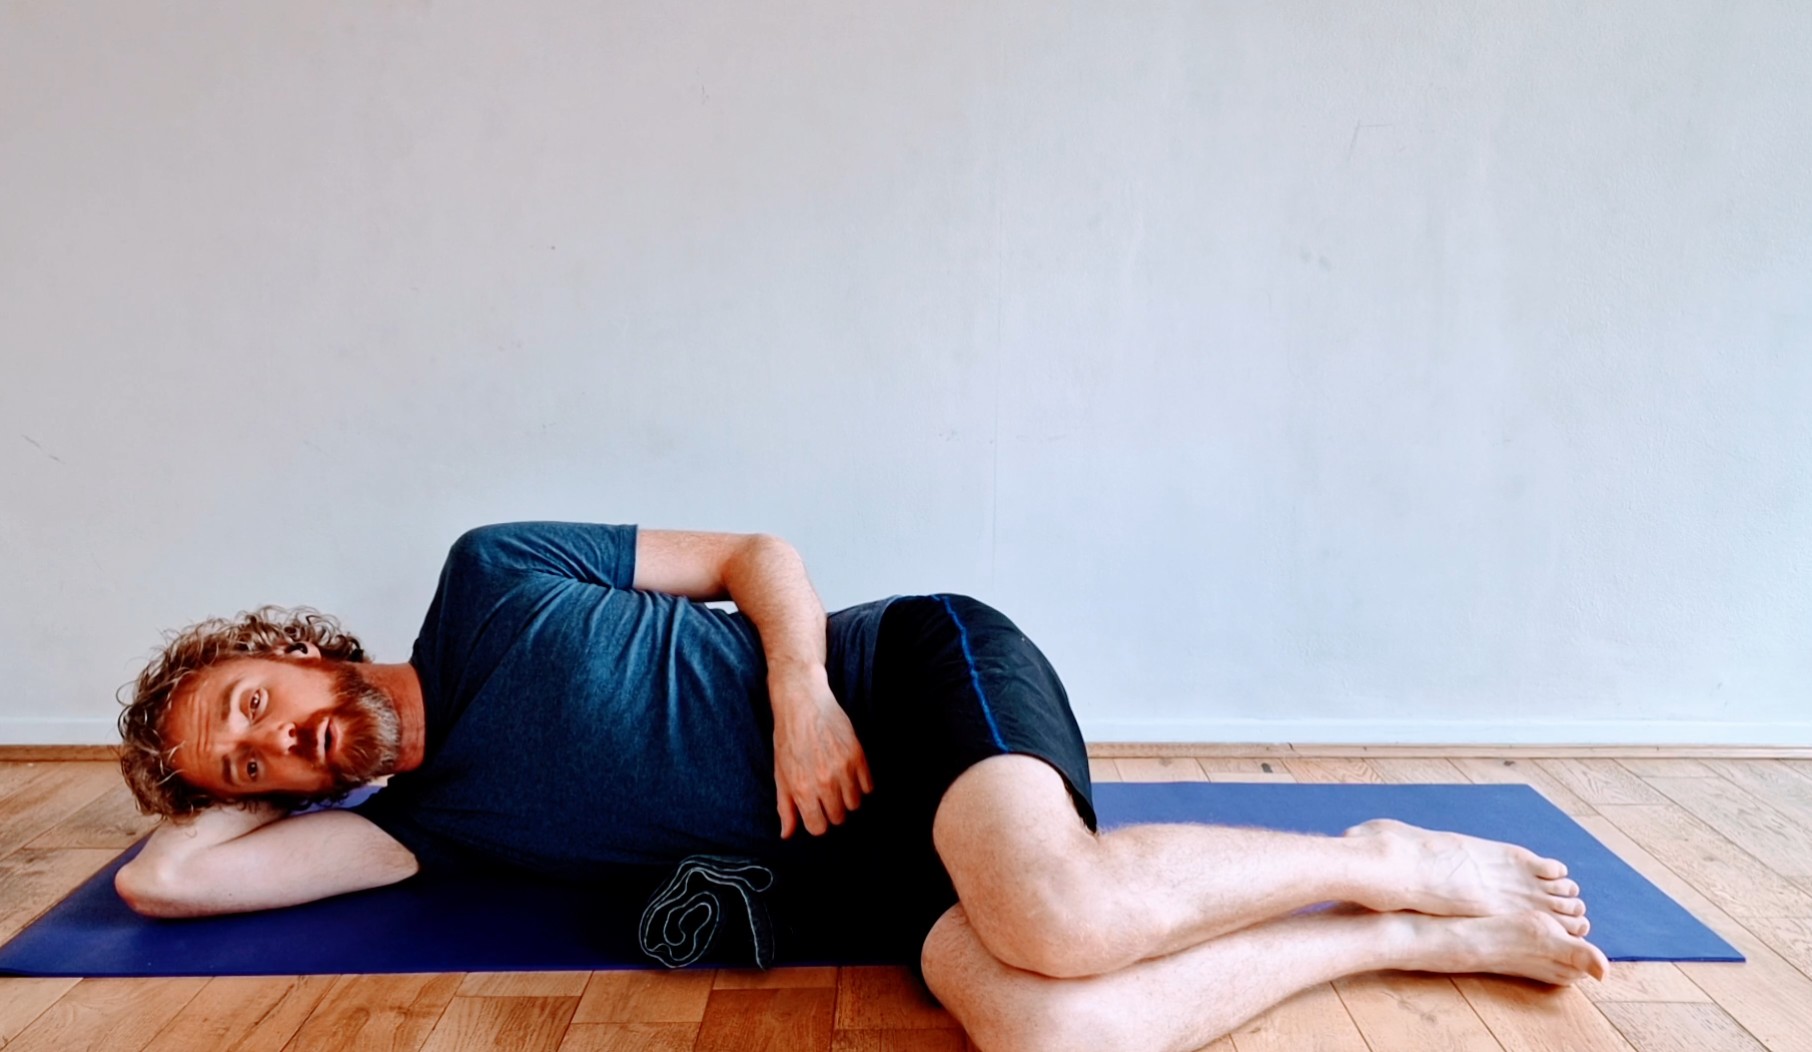
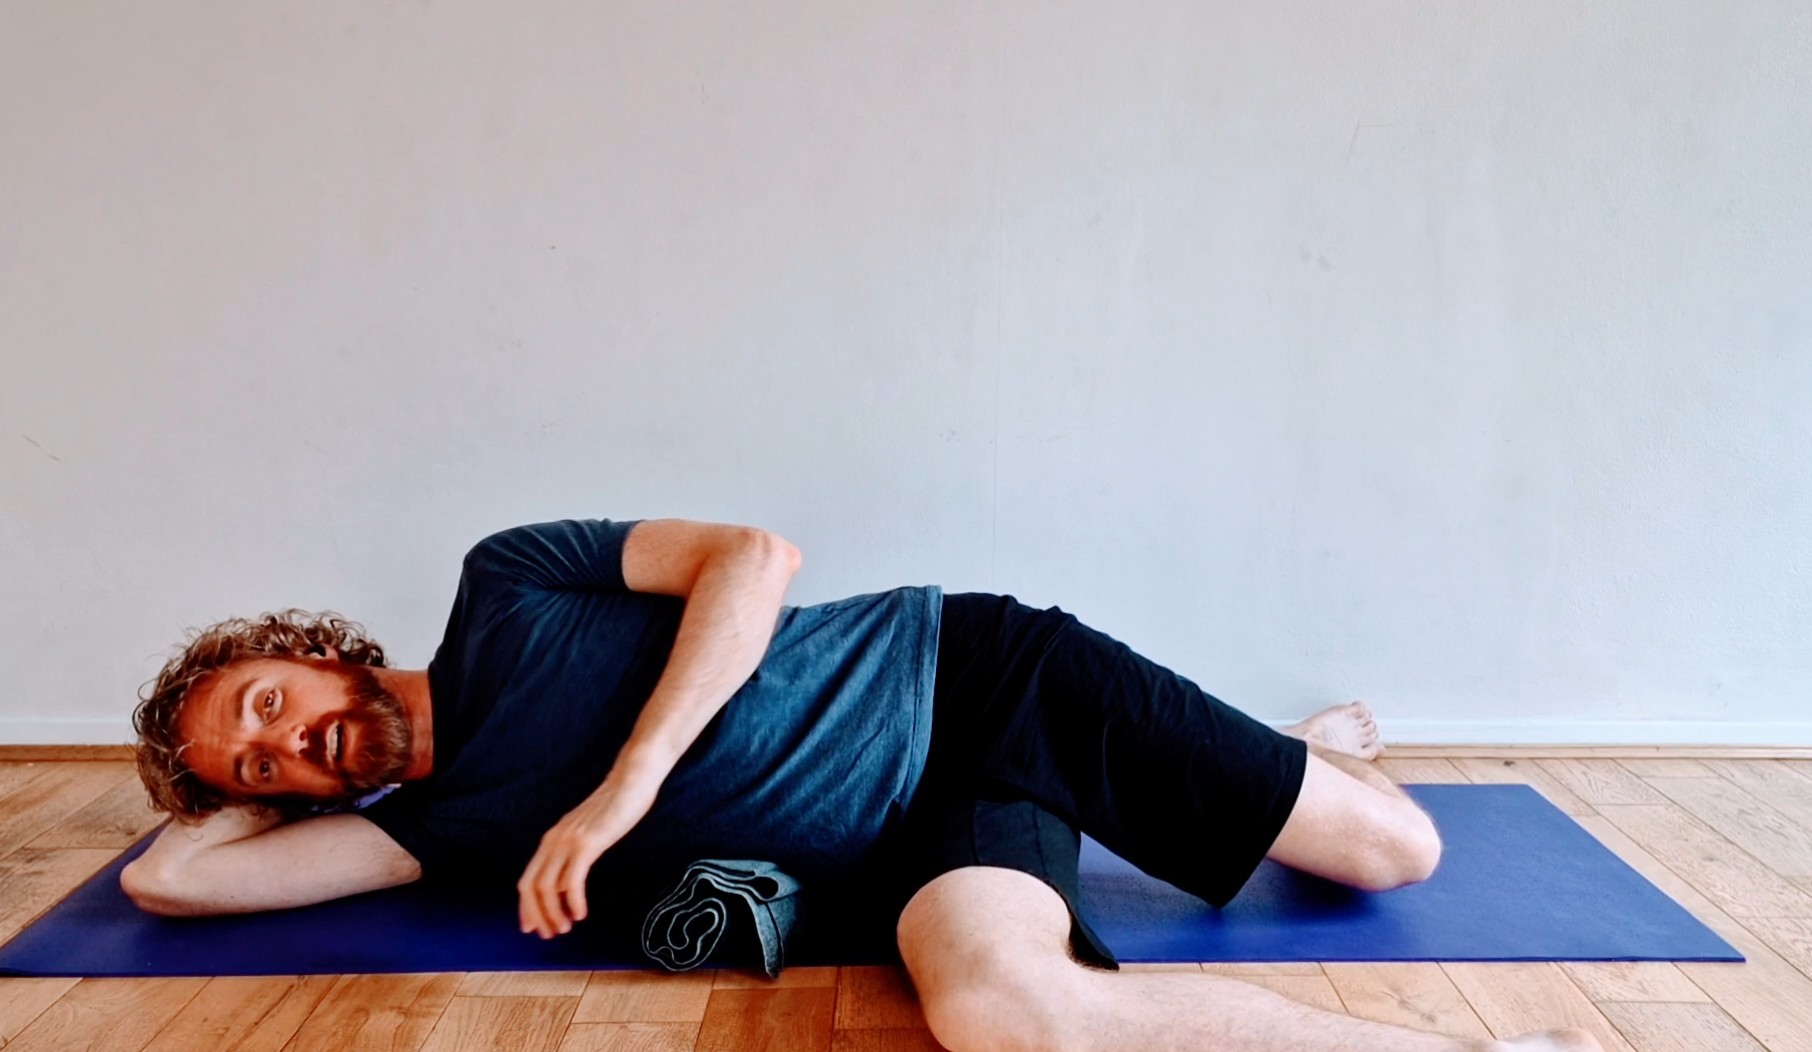
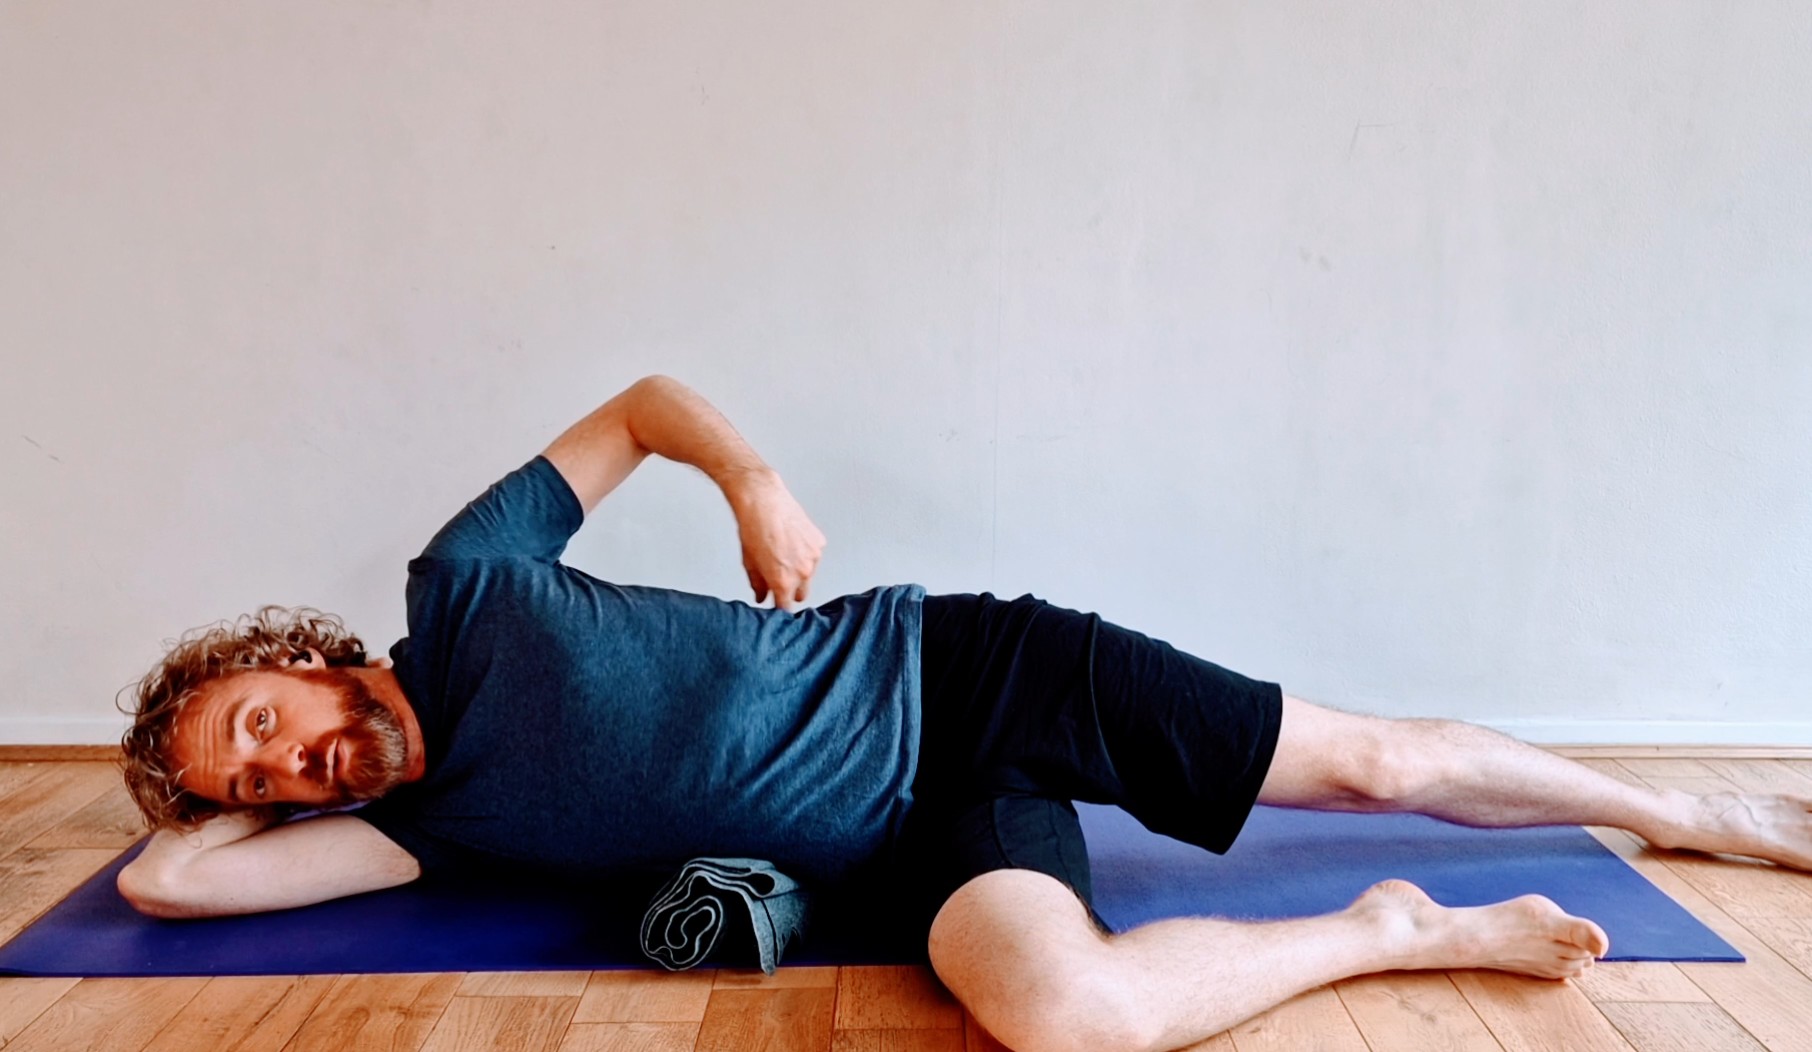
Positioning when on a bed – Simplified
This is the positioning to adopt when doing the stretch on a bed. It is simplified as the underneath foot is tucked under the knee, providing some support. This can be quite strong so build up to this position. Taking the arm above the head (right hand picture) brings in the latissimus dorsi muscles and lift the ribs away from the pelvis.
To come out of this position, slide the knee forwards on top of the underneath leg.
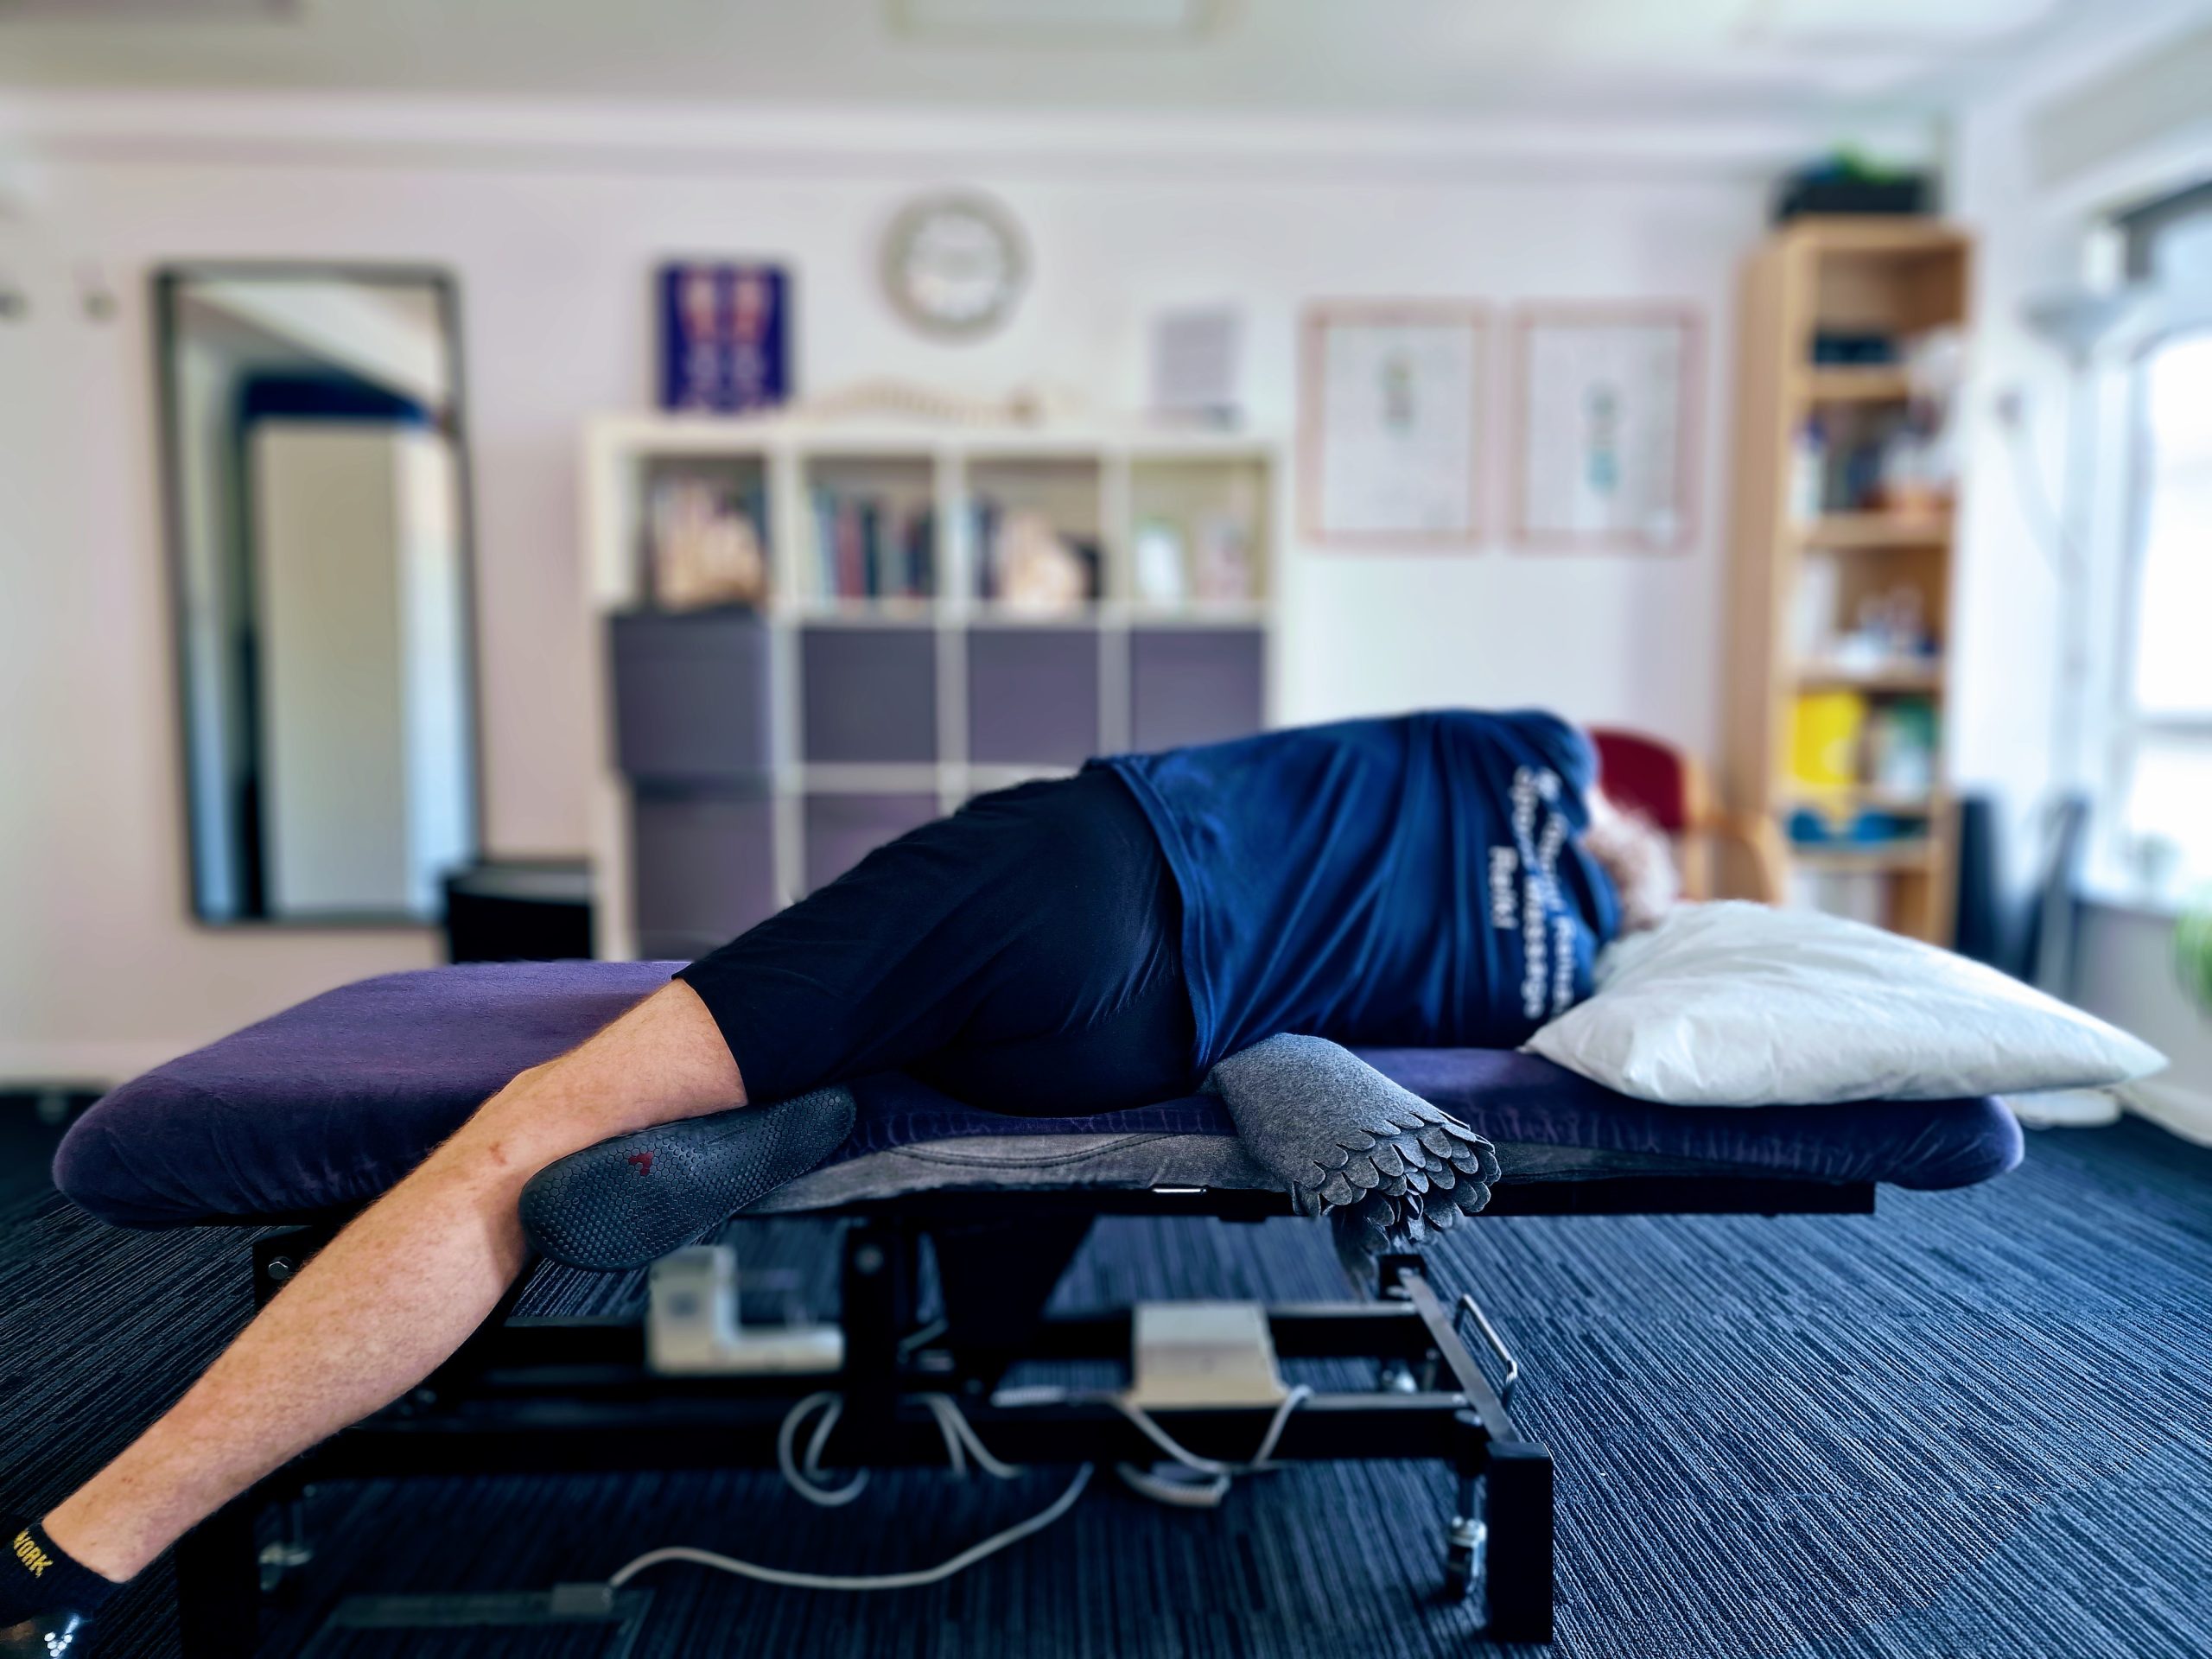
Positioning when on a bed – stronger
This is the positioning to adopt when doing the stretch on a bed. In this version there is no support to the top leg from the underneath leg. This can be quite strong so build up to this position. Taking the arm above the head (right hand picture) brings in the latissimus dorsi muscles and lift the ribs away from the pelvis.
To come out of this position, slide the knee forwards on top of the underneath leg.
Video
Here’s a short video of me doing the movement on the ground.
Thanks for reading this my lovely Interonauts.
Tim
